A SandboxVPS is an ideal tool to develop and test your brilliant idea for a competative price. A point will come where your ready to bring your project into production. This can be done at any time by simply upgrading to a BladeVPS or PerformanceVPS using one of two options:
- Using the 'to production' button in the control panel
- Cloning the SandboxVPS to a BladeVPS or PerformanceVPS
In this tutorial, we demonstrate the steps using the 'to production' button to upgrade a SandboxVPS to a BladeVPS or PerformanceVPS.
- A SandboxVPS with an active VPS lock cannot be cloned.
- VPS Firewall settings are copied automatically.
- Does the original VPS have a Big Storage attached? Frst remove the line in /etc/fstab before cloning the VPS, or your clone will fail to start.
- You cannot clone to a smaller VPS.
- If you configured the IP addresses on your VPS statically, you will not be able to use the network-connectivity of the new VPS yet as it will also copy the network-configuration. Because you can not use the original IP addresses, you need to first manually alter the network-settings and configure the IP address(es), to allocate the new IP addresses and remove the existing ones from the new VPS. In this article you'll find an instruction for configuring static IP's in Linux and in this article for Windows.
- This process has no impact on services on the old VPS, such as Big Storage. It'll remain attached and usable.
- It is strongly recommended to disable the VPS before you create a Snapshot. This prevents that data which was still stored in the RAM and data that is still written during the snapshot is not included in the snapshot (with possible corruption as a result).
Bringing a SandboxVPS to production
Step 1
Log in op het TransIP control panel and select your SandboxVPS in the VPS tab.
Step 2
Click on 'ga naar productie'.
Step 3
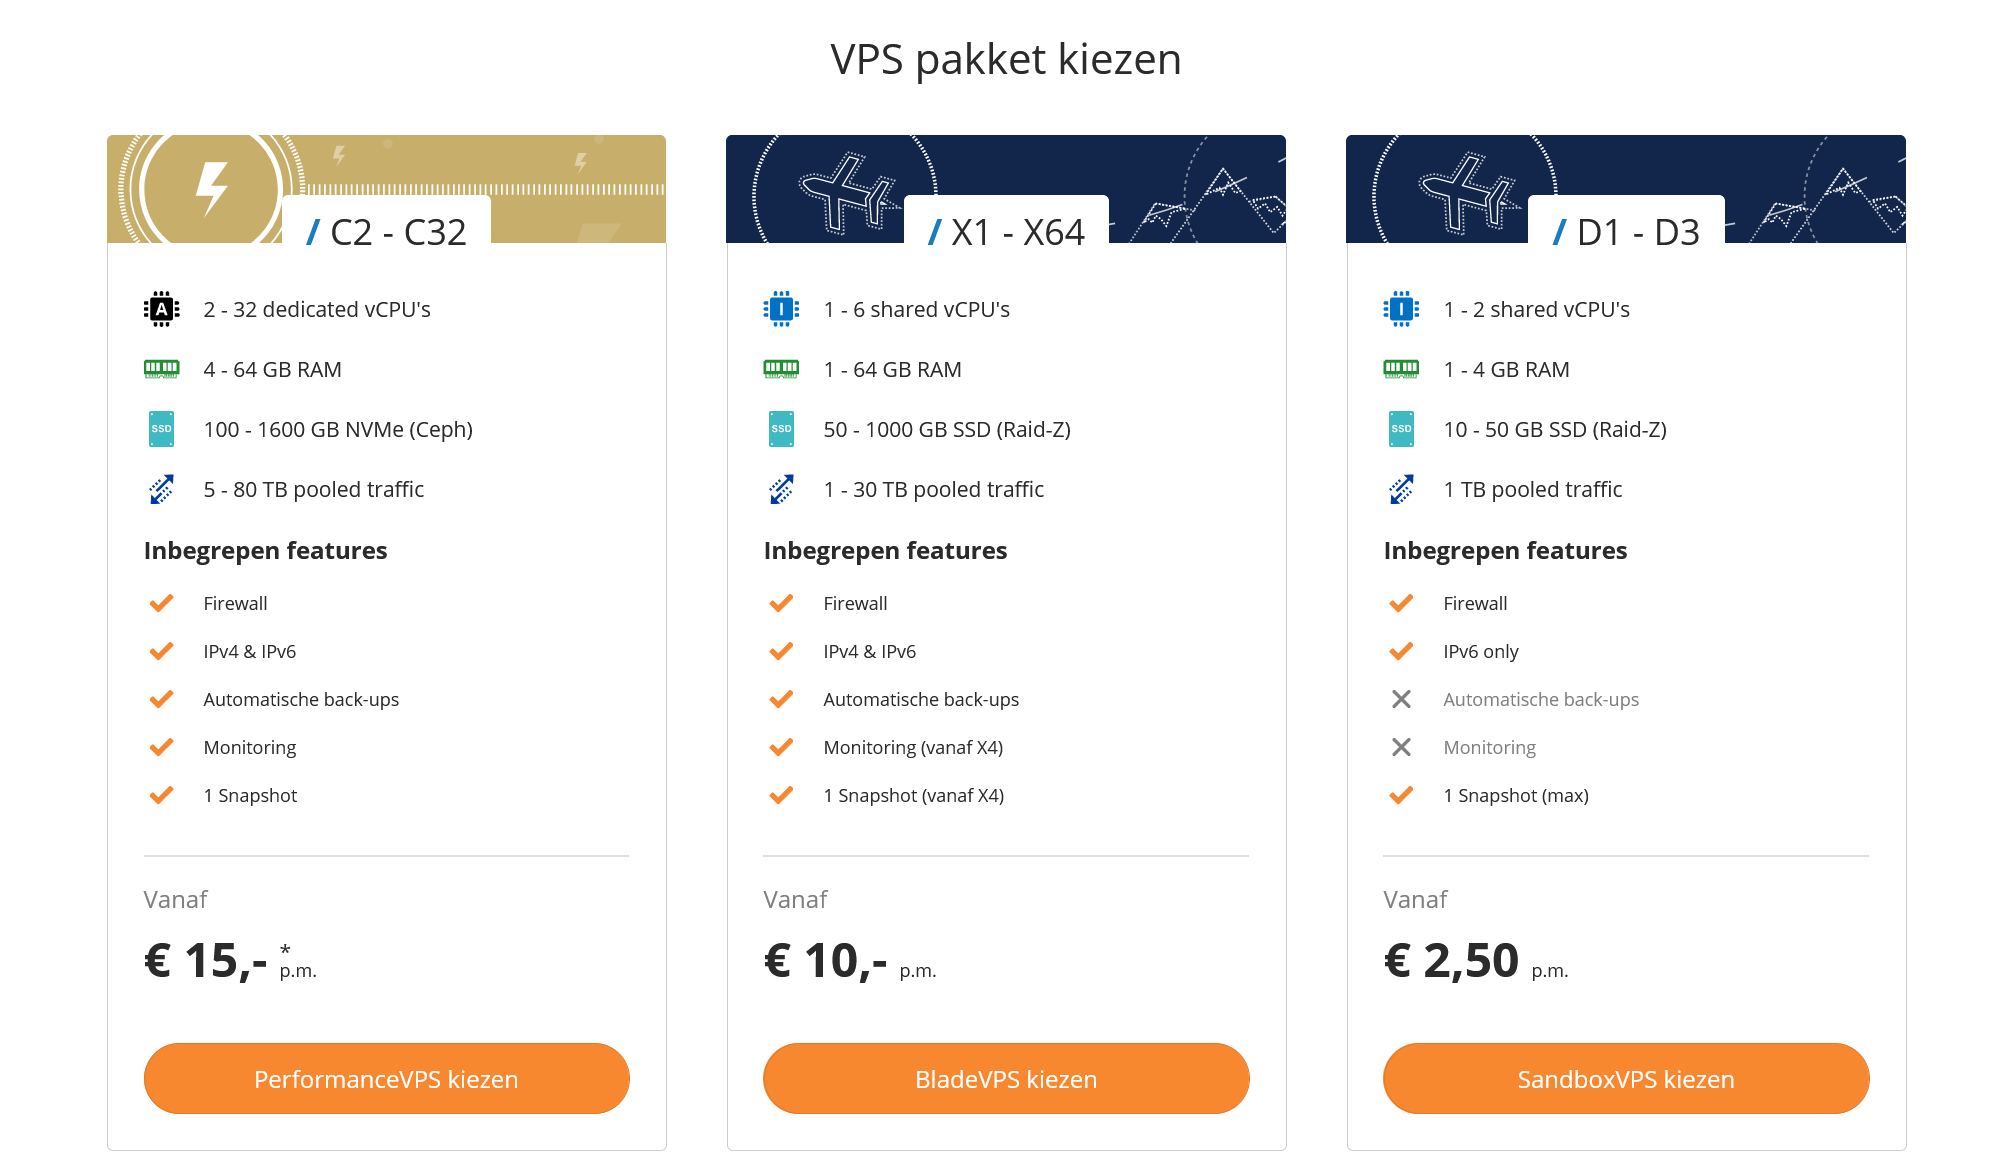
Select the type of VPS you'd like to convert your SandboxVPS to. Please note that the disk of the new VPS cannot be saller than that of the original SandboxVPS.
Step 4
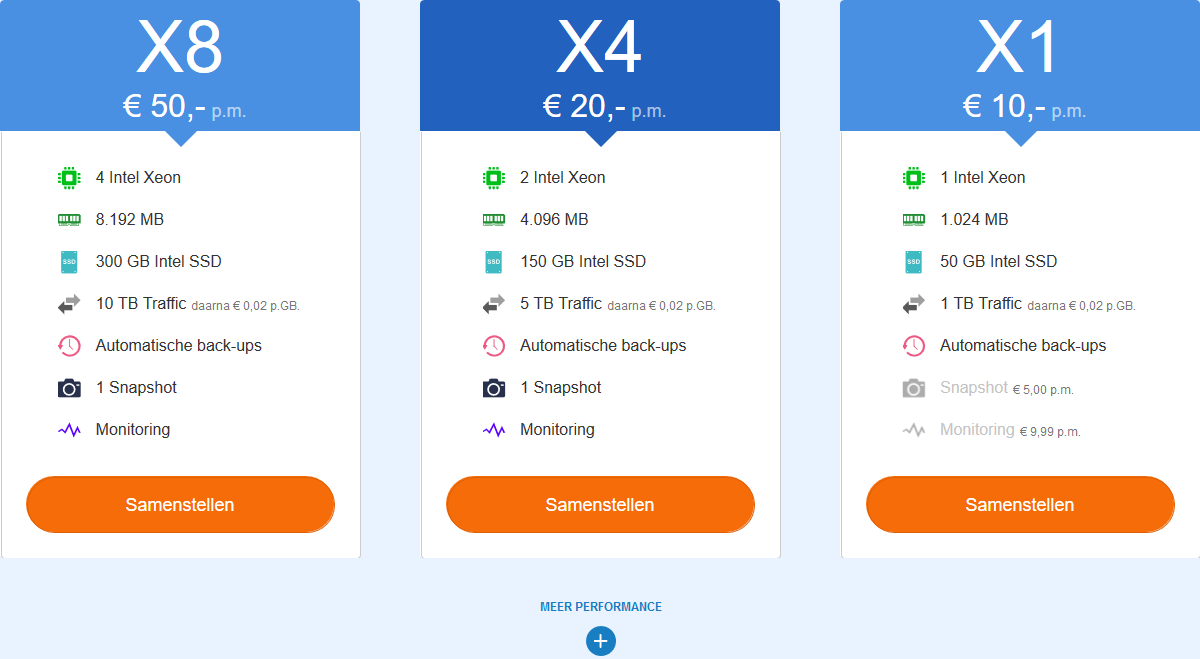
Click on 'Configure' under the type of VPS you'd like to convert to. By clicking on 'More performance' you can also choose a larger BladeVPS or PerformanceVPS.
Step 5
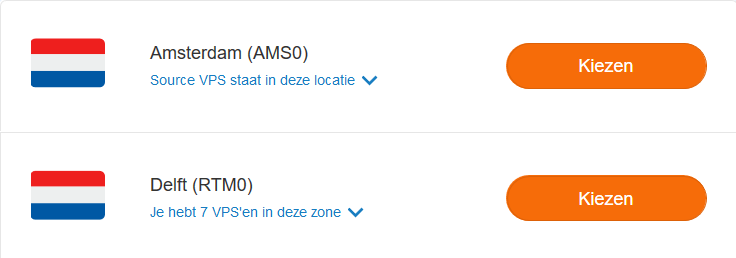
You're now shown the available availability zones, and in which availability zone the original SandboxVPS is located. Click on 'Choose' behind the availability zone you'd like to convert your SandboxVPS to.
Step 6
Klik tot slot op 'Bestelling afrekenen' om het omzetten van de SandboxVPS te voltooiien.
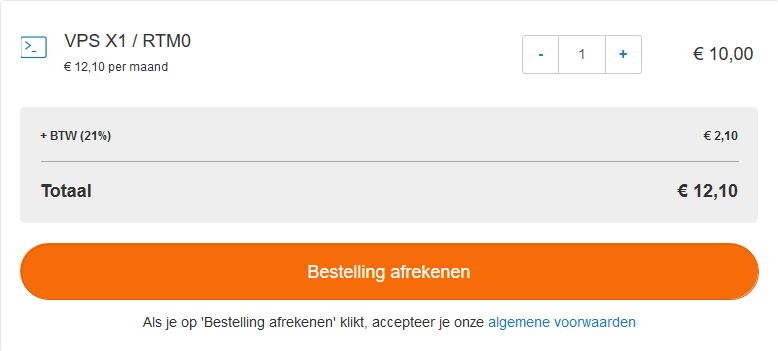
Het kan, afhankelijk van de grootte van de originele VPS, enige tijd duren voordat de nieuwe VPS volledig te gebruiken is. Wel zal de 'nieuwe' VPS al vrijwel direct na de bestelling in het overzicht van je VPSen zichtbaar zijn.
De oorspronkelijke SandboxVPS wordt niet automatisch opgezegd.
Stap 7
Na het opleveren van je nieuwe VPS, is het belangrijk daarop de netwerkconfiguratie aan te passen: een SandboxVPS maakt gebruik van IPv6, maar een BladeVPS en PerformanceVPS komt met zowel IPv4 als IPv6. In deze handleiding laten we zien hoe je statisch IPv4- en IPv6-adressen instelt op verschillende Linux-besturingssystemen en hier voor Windows Servers.
Daarmee zijn we aan het eind gekomen van deze handleiding over het omzetten van een SandboxVPS naar BladeVPS of PerformanceVPS.
Mocht je aan de hand van dit artikel nog vragen hebben, aarzel dan niet om onze supportafdeling te benaderen. Je kunt hen bereiken via de knop 'Neem contact op' onderaan deze pagina.
Wil je dit artikel met andere gebruikers bespreken, laat dan vooral een bericht achter onder 'Reacties'.
