This is the fourth part of our Plesk Tutorial Series. If you're configuring a new VPS we recommend starting with part 1.
Before you can use a (sub)domain within Plesk, your domain has to be linked to your VPS. In order to do this you direct your domain to your VPS in your DNS settings and add your domain in Plesk.
In the first part of this tutorial series, under the heading ‘logging in for the first time in Plesk’, you probably already added a domain during the step 'create your webspace' and created an SSH user. If you want to link a website and / or e-mail for the specified domain, follow the steps under 'DNS' below and then continue to part 5 of the Plesk tutorial series.
If you have not yet added a domain to your VPS, or you want to add an extra (sub) domain, or you want a domain to use the website of another domain (i.e. forwarding a domain), then follow the steps below.
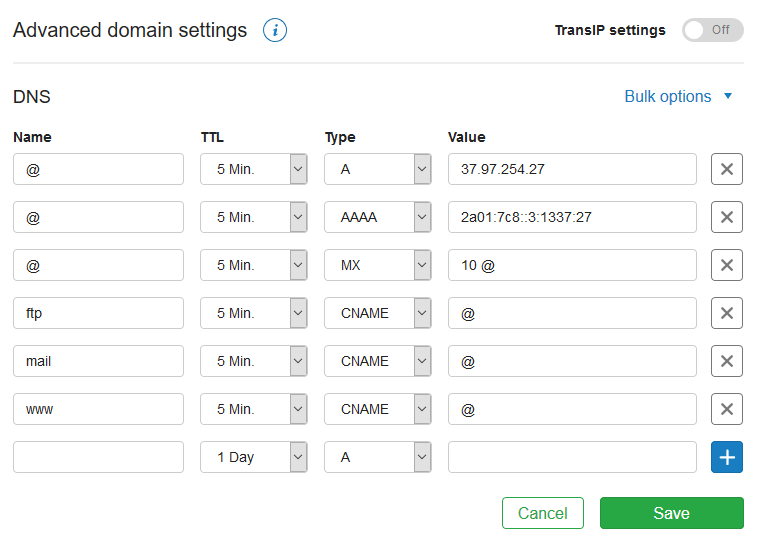
If you host a website for your domain on your VPS, it is not automatically accessible. In order to do this you have to direct DNS records from your domain to your VPS. Below is an example of what the DNS records for your domain could look like.
Important: Plesk uses the subdomain 'webmail' (e.g. webmail.yourdomain.com) to reach your webmail. If you want to use webmail for your domain, you have to create this subdomain.
It takes up to 24 hours (often shorter) before DNS changes are processed and visible worldwide. This is something we cannot influence unfortunately.
Please note: The ins and outs of DNS fall outside the scope of this manual. For more information about DNS, see this article.
In the steps below, we show you how to add a new domain in Plesk. For security reasons, you always create a new FTP (and optional SSH) user for the FTP management of the domain in this process.
If you plan to give people access to, for example, their own domain or Plesk account, it is advisable that you are familiar with how Plesk Users, Roles, Customers and Subscriptions work. More information about this can be found in this article.
Step 1
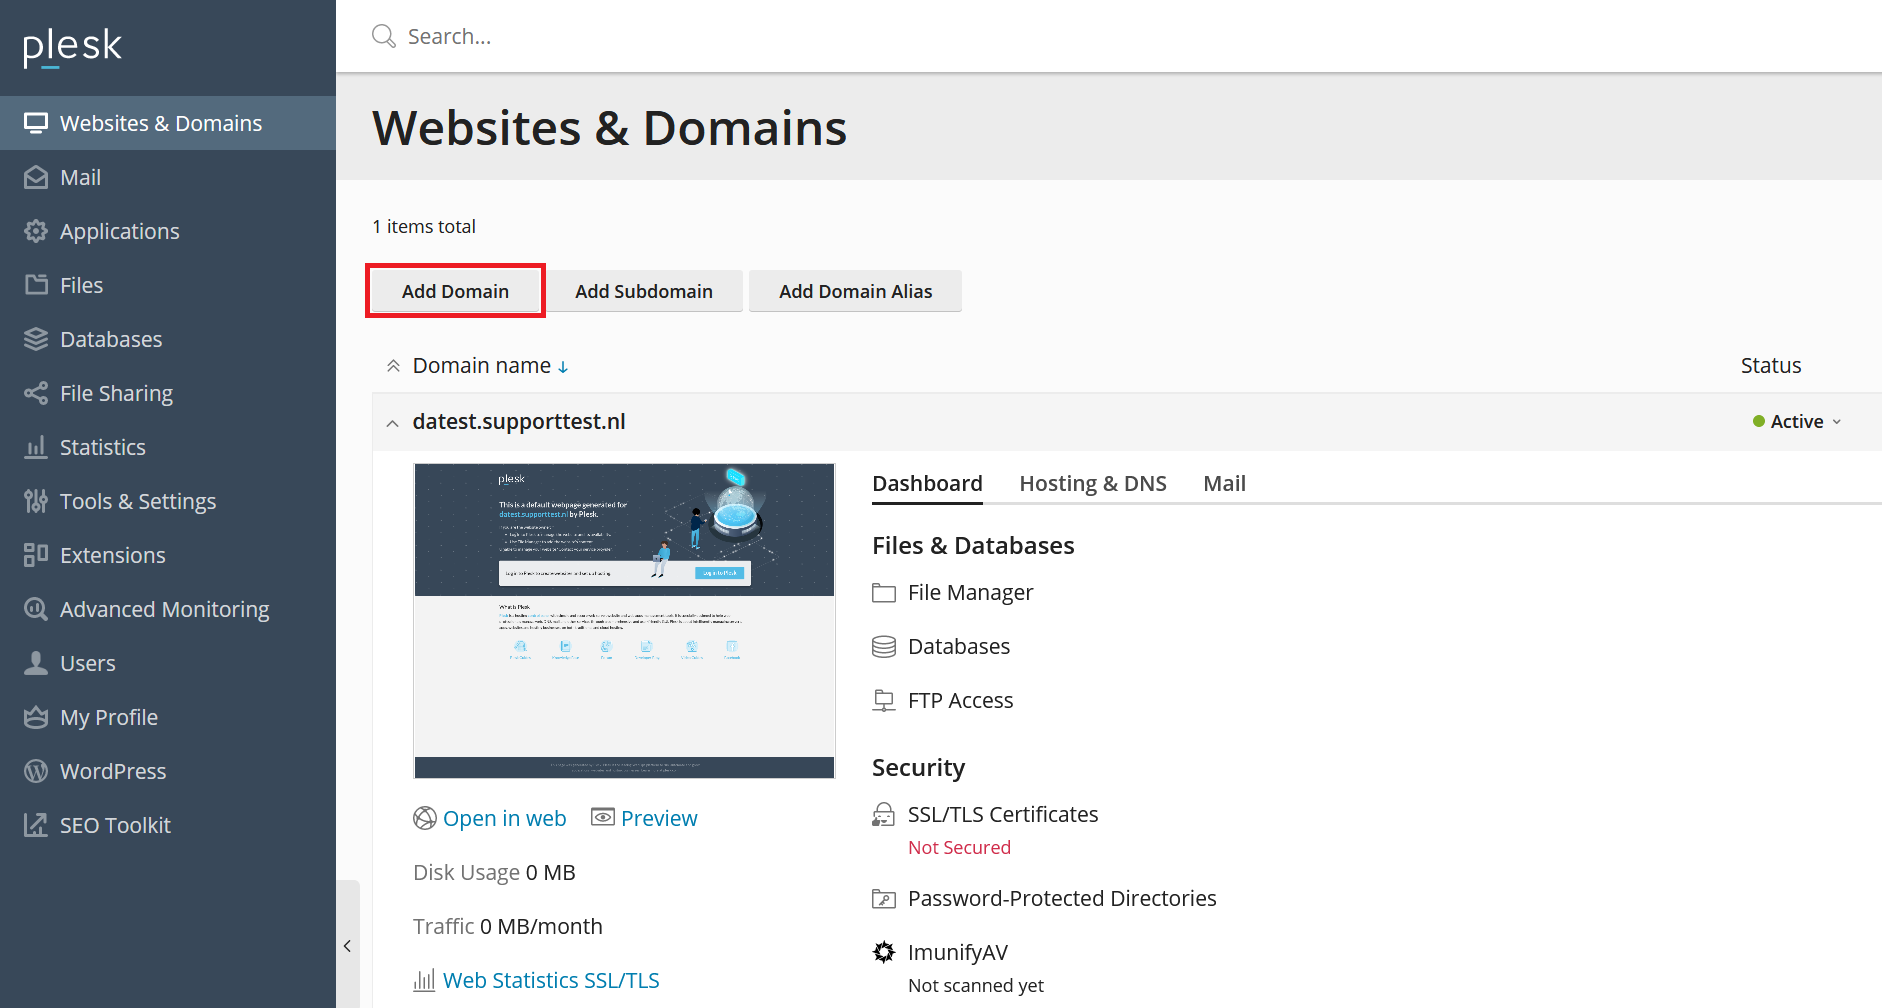
Log in to Plesk and go to 'Websites & Domains'. You will see an overview similar to below. Click on 'Add Domain'.
Step 2
Fill in the fields as shown in the screenshot below (but with your own data).
The name entered after 'Username' cannot be the name of the user you created in Step 5 of the part logging in for the first time in Plesk (in the first part of our Plesk tutorial series).

If you do not use a subdomain called 'webmail', do not enable Let's Encrypt for your domain on this page and use our article about SSL in Plesk. The reason for this is that this option also tries to link Let's Encrypt to webmail.yourdomain.com. If you do not use the webmail subdomain and do enable Let's Encrypt in the above steps, you will see an error message in Plesk after completing these steps.
Finally click on 'Ok' to add your domain.
Step 3
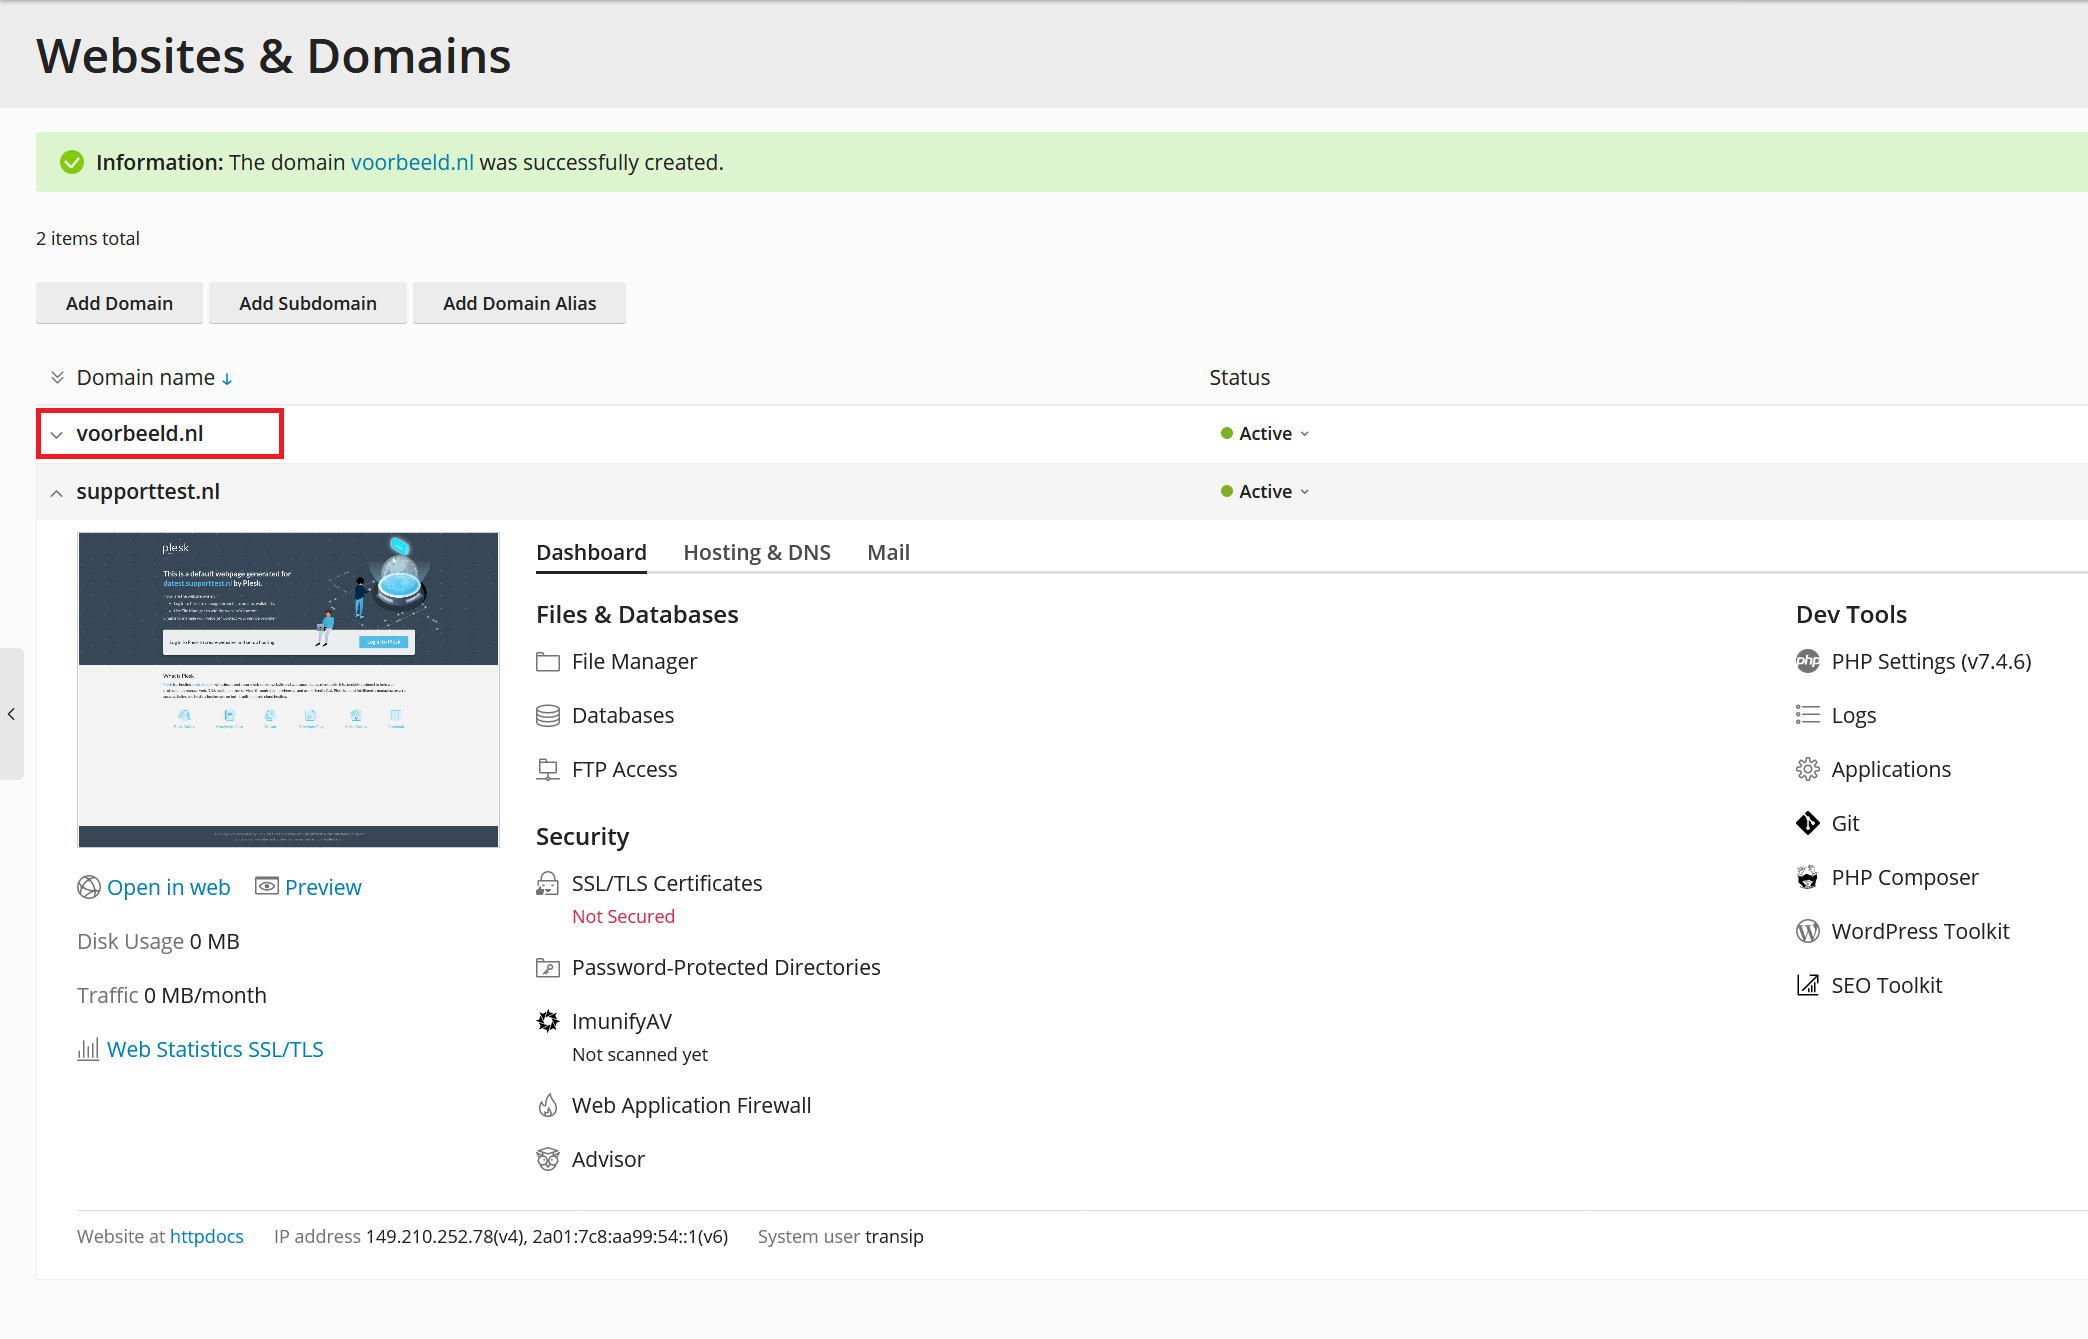
You will see a confirmation in a green bar as is shown in the screenshot below indicating your domain has been added successfully!
Tip: Click on the blue bar showing your domain name to show or hide the options for your domain.
Optional: Give SSH access to the new user
In the previous 3 steps you have added a new domain and user to Plesk. This user only has FTPS access (and not SSH or Plesk). If you also want to give the user SSH access, follow the steps below.
Step 1
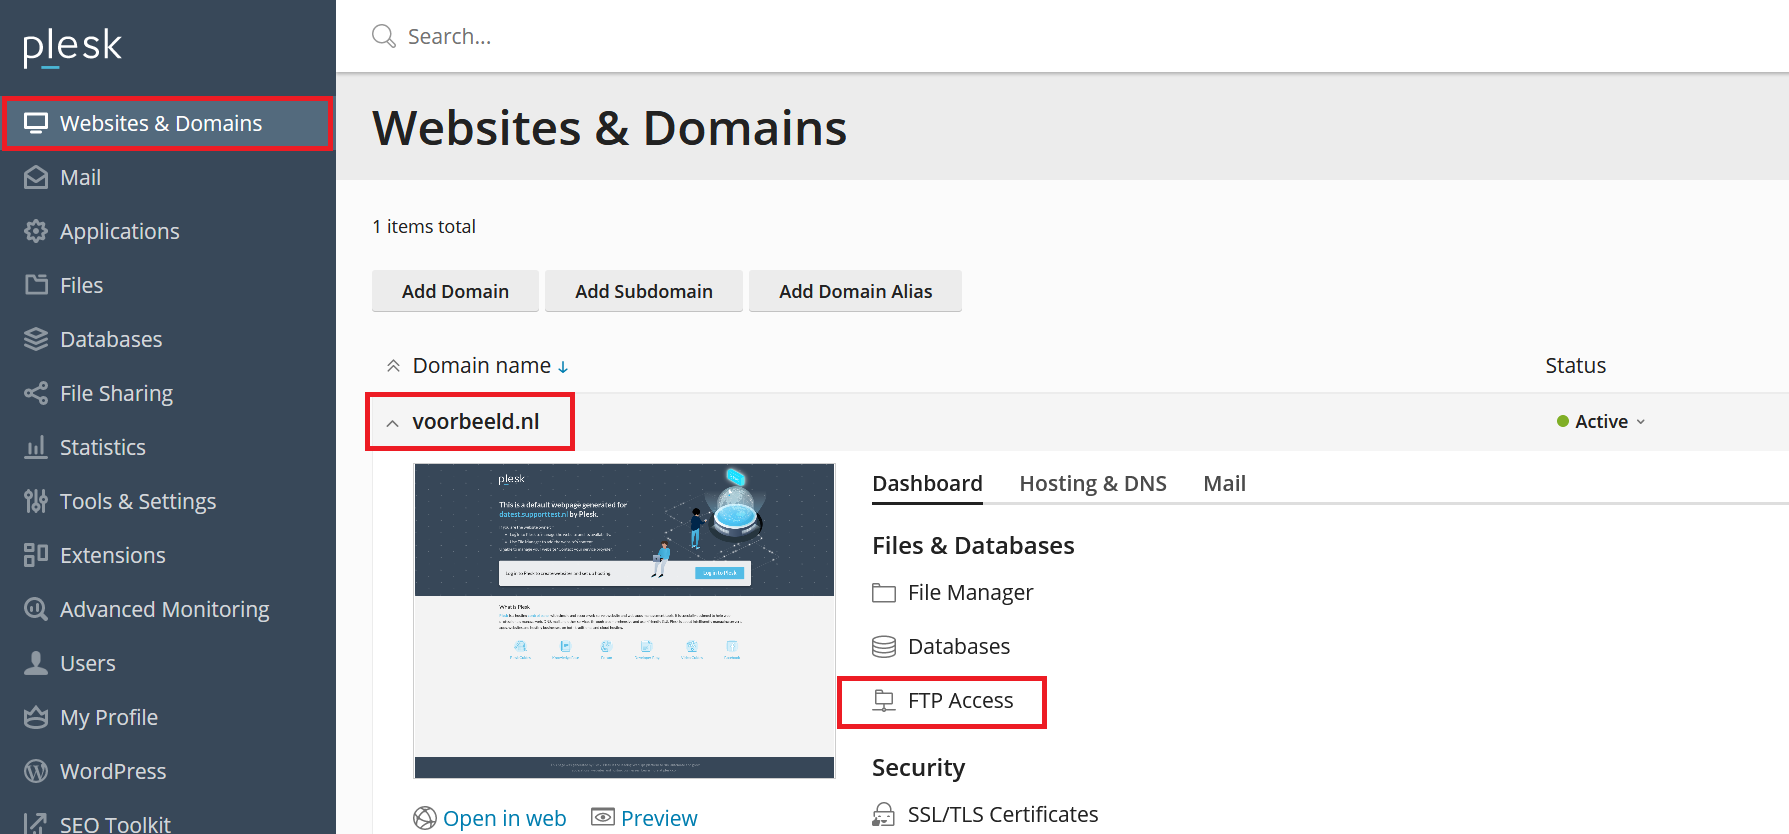
In Plesk, click on 'Websites & Domains'> 'FTP Access'.
Step 2
The user you created in step 2 above has been filled in automatically. Change 'Access to server over SSH' from 'forbidden' to /bin/sh/.
Then click on 'Apply' and then on 'Ok'. That's it! This user can now connect to your VPS via SSH and FTP. For SSH, log in with this user and switch to the root user with the command:
su root
Above we explained how to add a domain to a new (FTP) user in Plesk. Below we show you how to add a subdomain in Plesk.
Step 1
Log in to Plesk and go to 'Websites & Domains'. You will see an overview as shown below. Click on 'Add Subomain'.

Step 2
Enter the name of your subdomain and click ‘OK’.
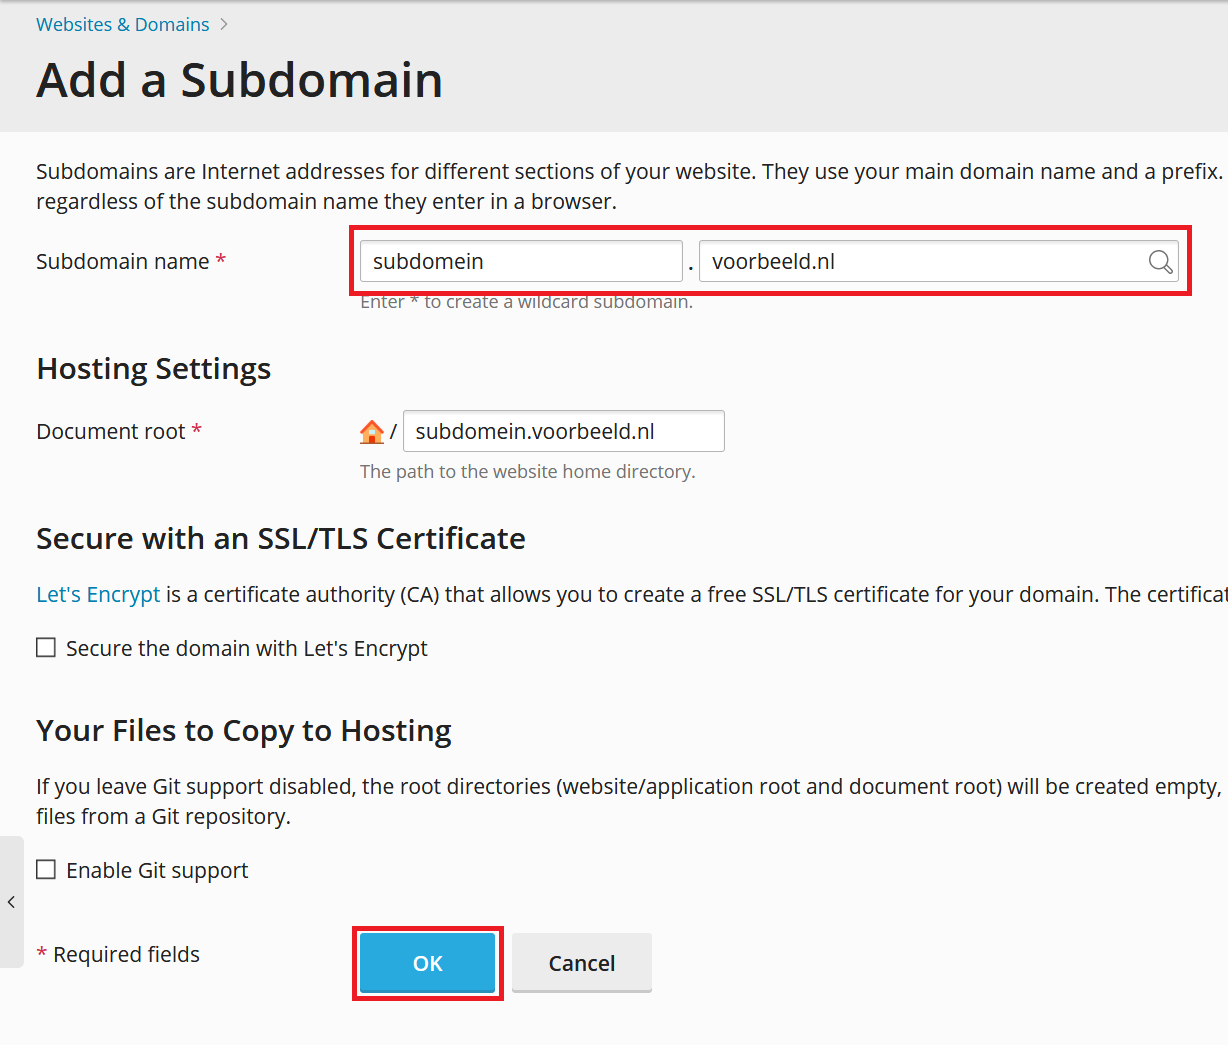
If you do not use a subdomain called 'webmail', do not enable Let's Encrypt for your domain on this page and use our article about SSL in Plesk. The reason for this is that this option tries to link Let's Encrypt to webmail.yourdomain.com. If you do not use the webmail subdomain and do enable Let's Encrypt in the above steps, you will see an error message in Plesk after completing these steps.
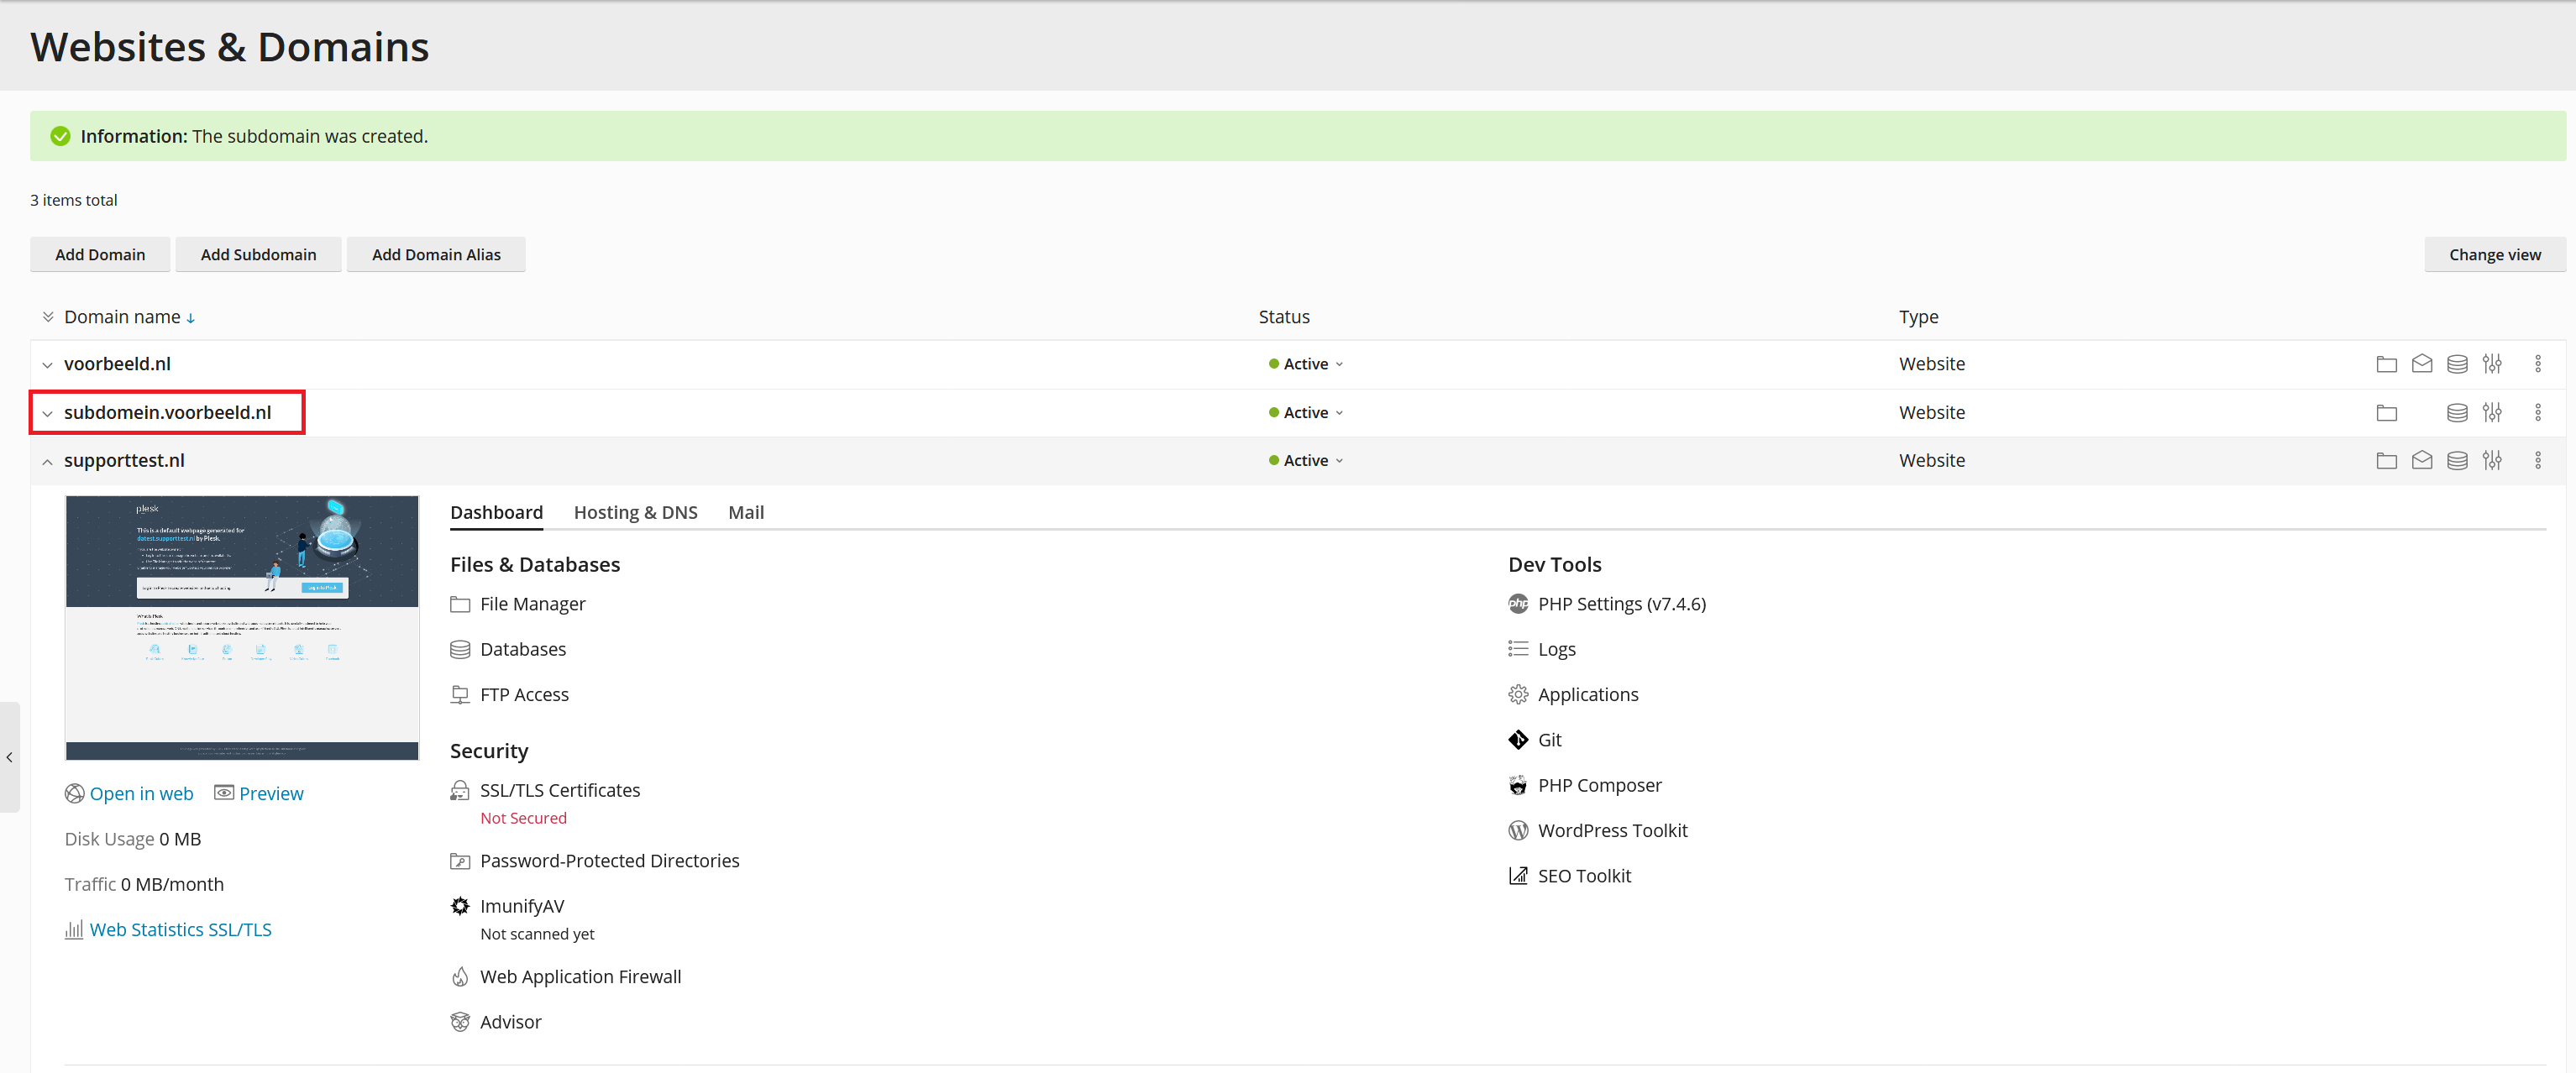
You manage your subdomain just like the main domain and it gets its own entry under 'Websites & Domains'. When using FTP (and SSH), you use the same username for your subdomain as for the domain itself.
Perhaps you'd like to have more than one domain point to the same website. Plesk uses a 'Domain Alias' for this.
In order to use a 'Domain Alias', the website you want to forward to and the domain you want to forward must be included in the account of the same user / customer. In addition, the DNS of the domain that you want to link to the same website must point to your VPS (see DNS at the top of this article).
Step 1
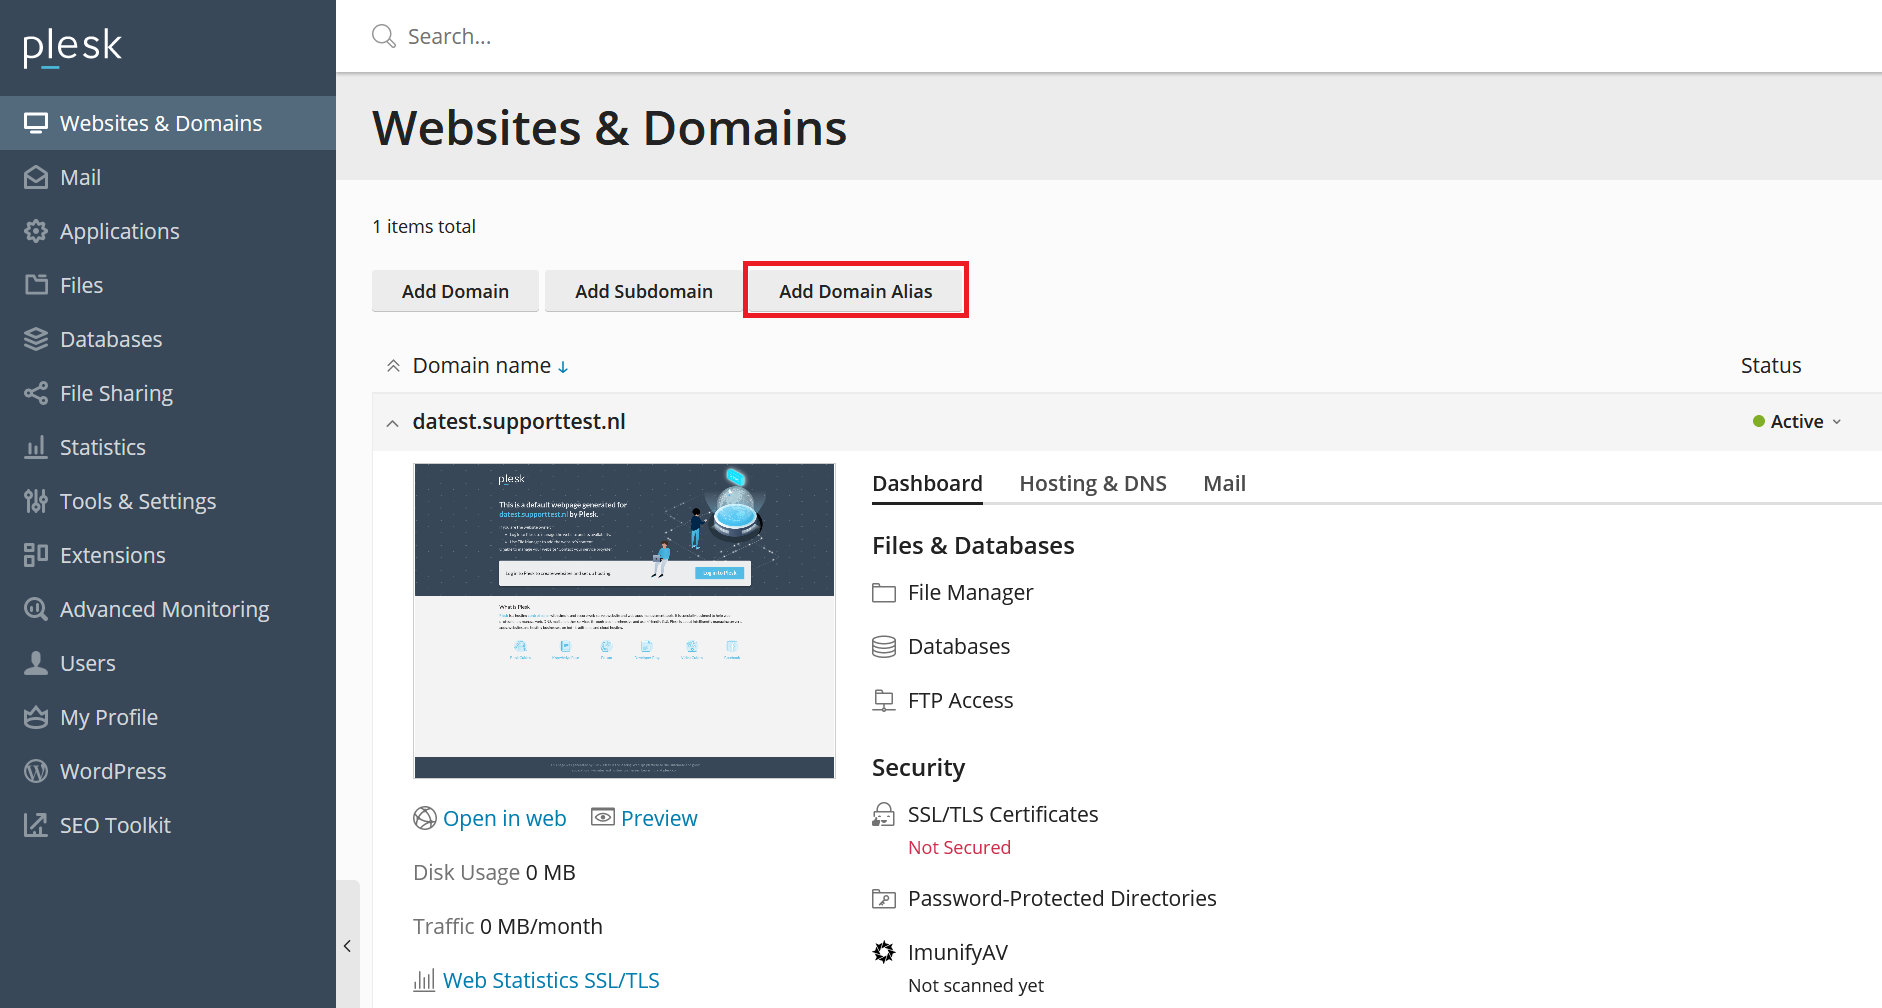
Log in to Plesk and go to 'Websites & Domains'. You will see an overview as shown below. Click on 'Add Domain Alias'.
Step 2
Enter the name of the domain that you want to link to the same site in the 'Domain alias name' field and adjust the settings under 'Settings' as desired. Click 'OK' to add your domain alias.
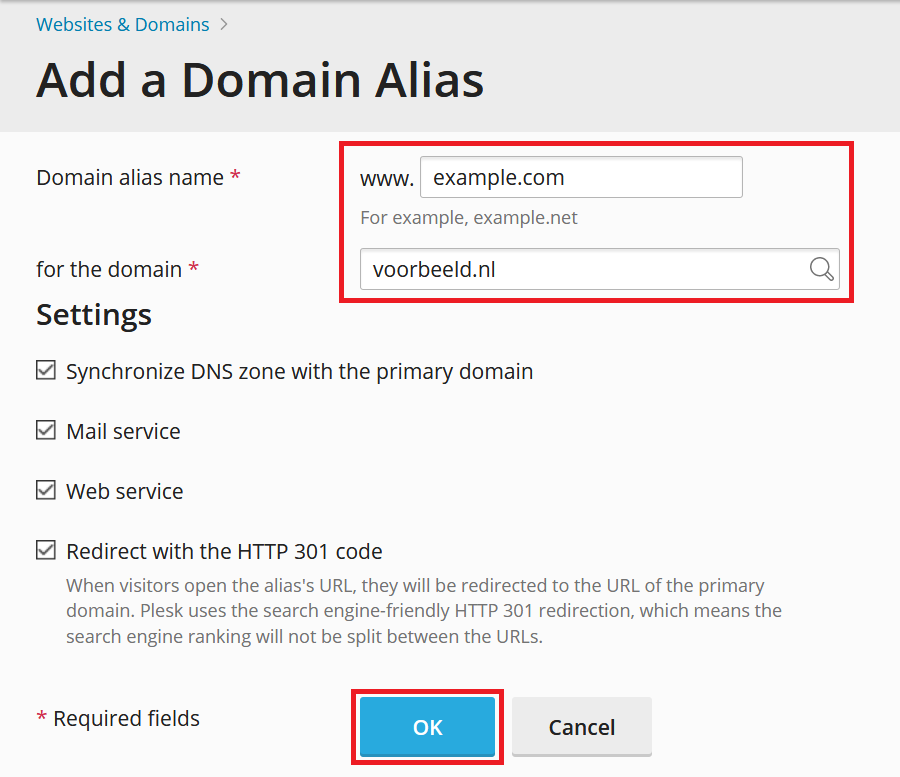
- Synchronize DNS zone with the primary domain: this option is only relevant if you manage the DNS of your domain in Plesk, but it does not hurt to leave it enabled: your DNS for this domain will still be managed by the party your nameservers refer to.
- Mail service: this ensures that all mail addresses of the main domain are also available under the name of the alias. This means that if example.com is your main domain and domain.com is your alias, when you create the mail address test@example.com, also test@domain.com is created. Mail addressed to test@domain.com is also available in the mailbox of test@example.com (but not vice versa). Without this option, mail to test@domain.com would not arrive at test@example.com.
- Web service: with this option enabled, the URL of your domain alias will remain visible to visitors, even though they see the site of your domain of which the domain is an alias.
- Redirect with the HTTP 301 code: This option is important because this allows visitors of your domain alias to count towards the main domain for the indexing on search engines (e.g. Google). Without this option, this does not happen, and you lose rankings for your domain.
Always use this option, unless it is important that your alias has its own rankings in search results on search engines.
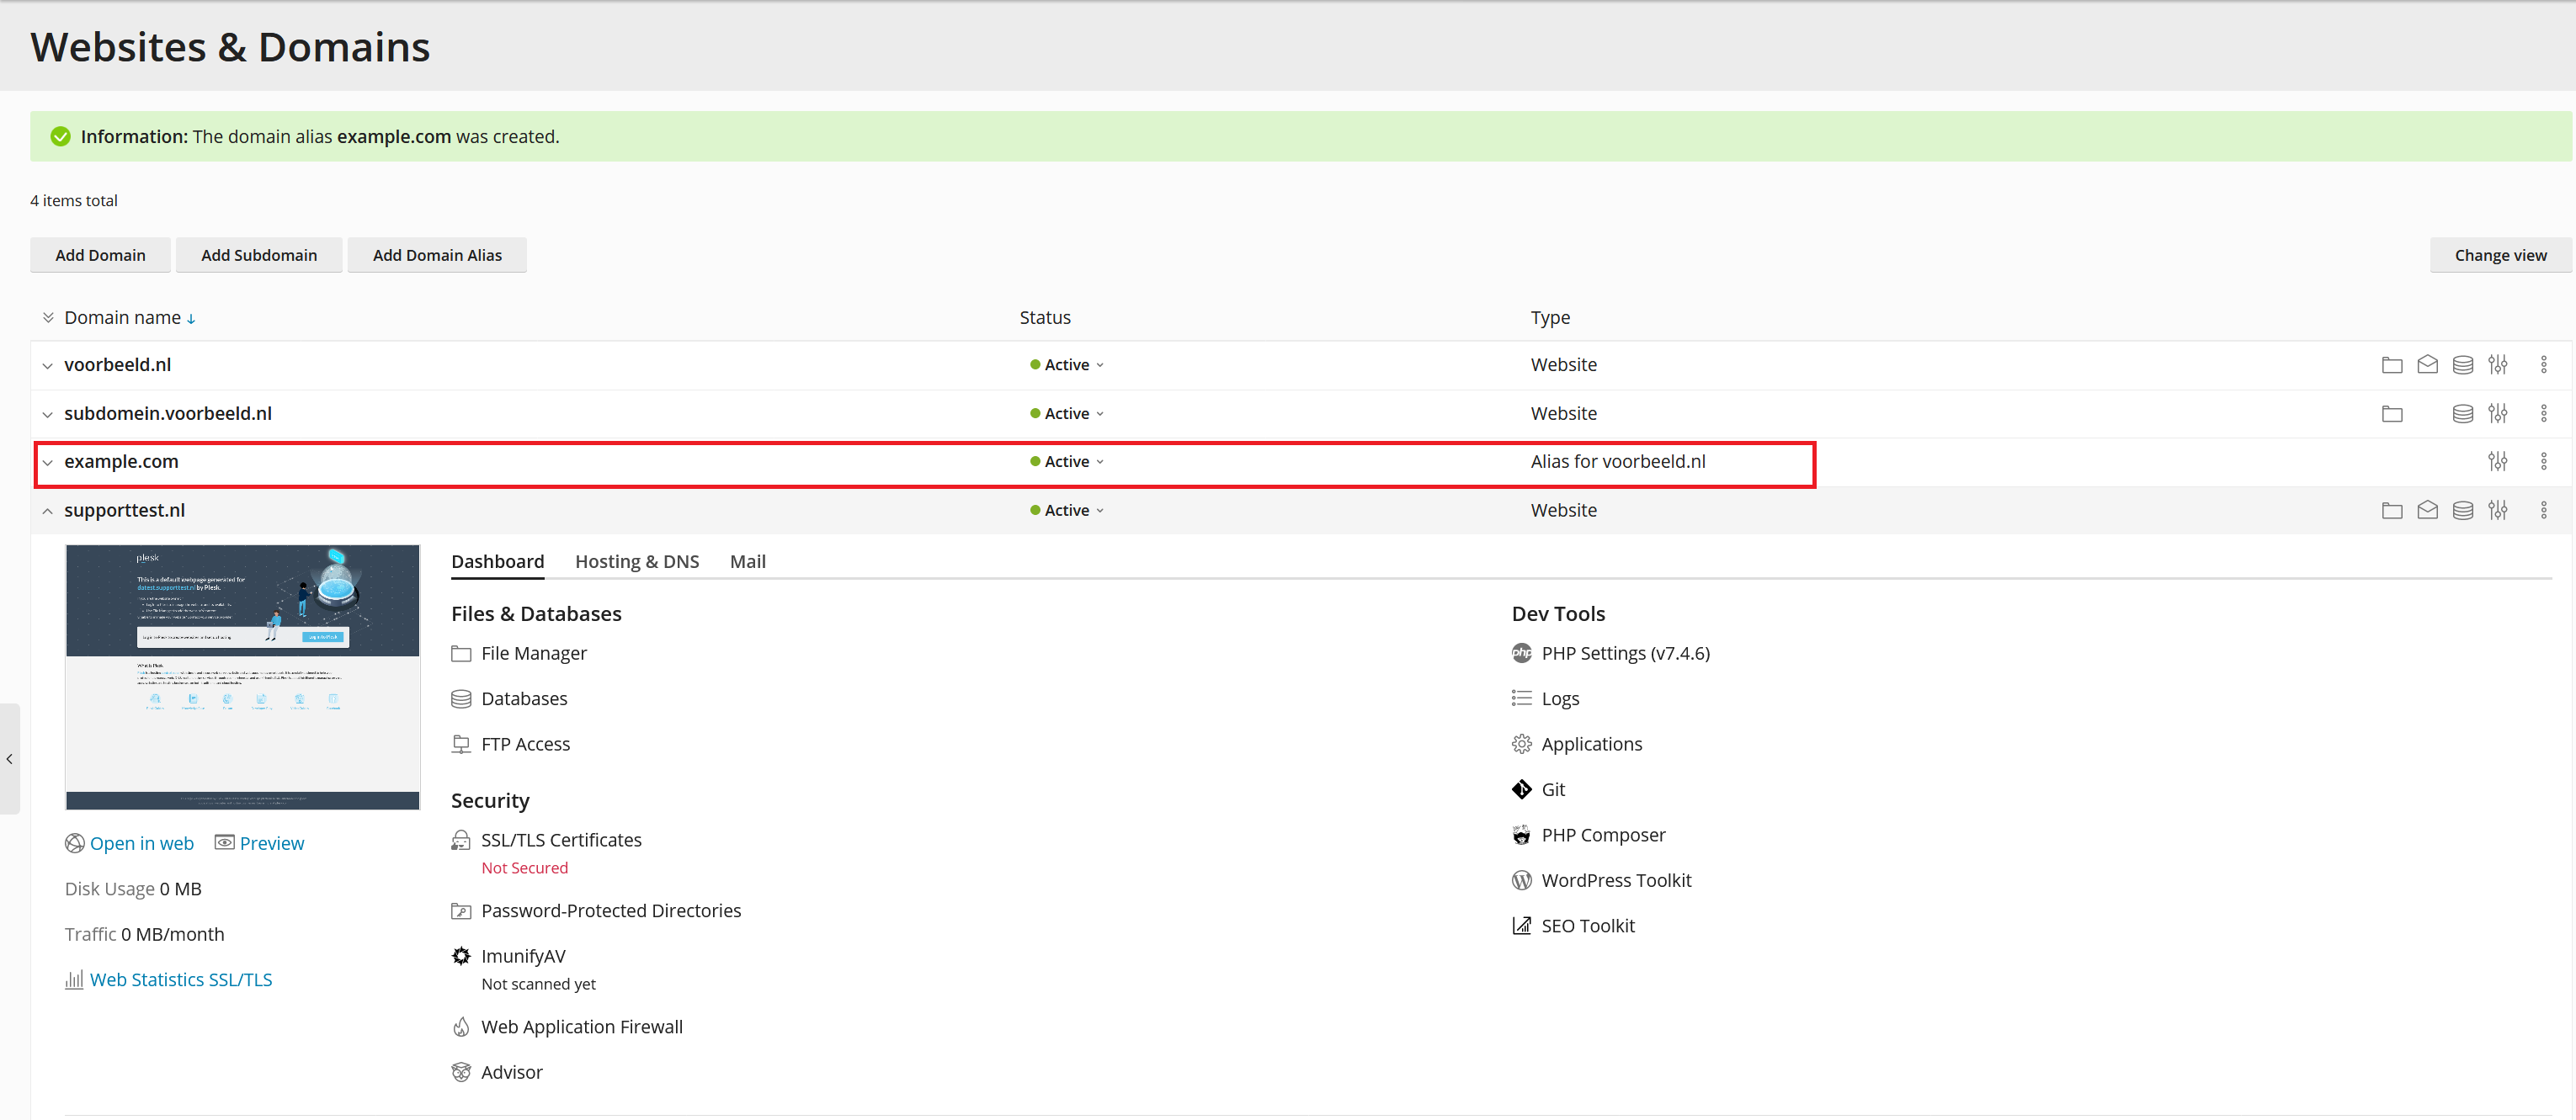
You manage your alias from within ‘Websites & Domains’, like you would manage your (sub)domains. An example is shown below.
- Synchronize DNS zone with the primary domain: this option is only relevant if you manage the DNS of your domain in Plesk, but it does not hurt to leave it enabled: your DNS for this domain will still be managed by the party your nameservers refer to.
Now that you have linked your domain to your VPS you can start setting up your website and / or mail. Proceed to part 5 for the uploading of your website, database and use of SSL, or continue to part 6 if you only want to set up your e-mail.
Should you have any questions left regarding this article, do not hesitate to contact our support department. You can reach them via the ‘Contact Us’ button at the bottom of this page.
If you want to discuss this article with other users, please leave a message under 'Comments'.
