


In this article, we show you how to use automatic authentication with the TransIP REST API in PHP. Before you start this article, enable the API and generate a Key Pair. In this article, we explain how this works and what it serves.
Are you experienced with our API and would you like to get started right away? On this Github page you'll find the PHP library of our REST-API.
Requirements
To use the REST-API PHP-Library, the following software must be installed on your server:
- PHP 7.2 or newer
- PHP-json
- OpenSSL
- Composer
PHP
For the installation of an Apache server with PHP, you can use our tutorials for installing Apache with PHP support. You're not required to install Apache if you don't want to host a website and can instead only use the steps that deal with PHP.
PHP-json + OpenSSL
Depending on your operating system, install the PHP-json extension and OpenSSL with:
CentOS:
sudo yum -y install php-json opensslUbuntu / Debian:
apt -y install php-json openssl
Composer
Composer is a tool for dependency management in PHP. With this, you can easily indicate which libraries your project needs (the dependencies) and Composer then manages these for you. For the installation of Composer in Linux you can use this tutorial.
Automatic authentication
In the steps below, we show you how to automatically arrange the authentication with the TransIP REST API via PHP.
Step 1
Connect to your server via command-line / RDP.
Step 2
Navigate to your project directory on your VPS, suppose you want to use the API on your website example.com, then this could be:
cd /var/www/html/example.com
Step 3
To be able to use Composer, a file called composer.json must be present in the project directory containing the 'require key'. The require key tells composer which packages your project needs.
New composer project
If you start a new project and you haven't used Composer for it yet, composer.json will not be present. Create this file with:
touch composer.json
    echo '{' > composer.json
    echo '   "require": '{ >> composer.json
    echo '   }' >> composer.json
    echo '}' >> composer.json
Do you get an error saying the file cannot be created? Check if the user account you're connected with has access to read/write the folder you're working in.
Afterwards, proceed to step 4.
Existing composer project
Has your project already been initialized? Then just add the REST API as a requirement with the command below and then proceed to Step 5:
composer require transip/transip-api-php
Initiate the project in Composer with the command:
composer initYou're now asked several questions based on which a configuration file called composer.json will be generated. Below is an example of these steps with an explanation of each item below.
transip API demonyes
transip/transip-api-php^6.0noyesyes
Process the changes and update composer with the command:
composer updateThe output looks something like this:
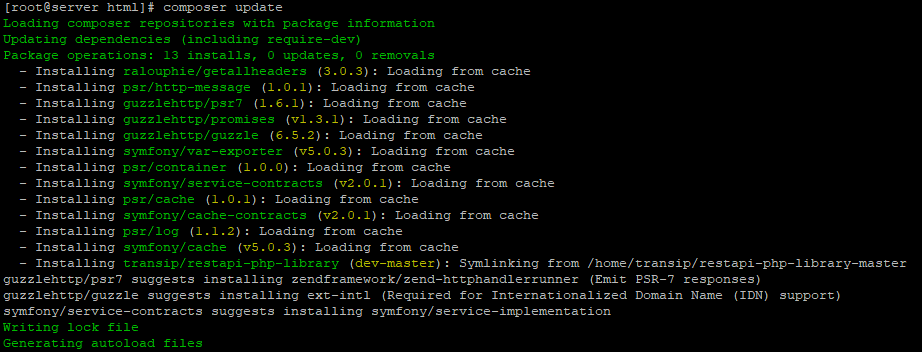
Instead of 'dev-master', transip/restapi-php-library will contain v6.0.0 or newer.
Step 6
Create a file that you use to make the connection to the API, for example:
nano Authenticate.phpGive the file the content below:
<?php
        use \Transip\Api\Library\TransipAPI;
        require_once(__DIR__ . '/vendor/autoload.php');
        // Your login name on the TransIP website.
        $login = 'youraccountname';
        // If the generated token should only be usable by whitelisted IP addresses in your Controlpanel
        $generateWhitelistOnlyTokens = true;
        // One of your private keys; these can be requested via your Controlpanel
        $privateKey = '';
        $api = new TransipAPI(
               $login,
               $privateKey,
               $generateWhitelistOnlyTokens
        );
// Set all generated tokens to read only mode (optional)$api->setReadOnlyMode(false);
        // Create a test connection to the api
        $response = $api->test()->test();
        if ($response === true) {
           echo 'API connection successful!';
}- Enter your TransIP account name after $login, for example $login = 'transip';
- Enter the value of your private key from step 1 of this section after $privateKey, for example:
$privateKey = '- $api->setReadOnlyMode(false); With read-only, you can only retrieve data, such as a list of VPSs or domains, but you cannot perform operations such as ordering or canceling a VPS or domain. If you want to create the tokens in read-only mode, adjust 'false' to 'true'.
Close the file and give permission to save the changes (ctrl + x > y > enter).
Step 7
You can now directly test the API connection with the command:
php Auhenticate.phpYou will see the following output:
API connection succesful!Congratulations! You now have a working connection with the API. Are you receiving an error message? This can be for one of the following reasons:
- A different IPv6 address is used than you have whitelisted, and you receive a message 'Remote IP is not authorized for this request; called from IP <defaultrouteaddress> in ... '.
You can solve this by whitelisting the IPv6 address used for the API.
- A hick up in Composer. You exclude this as a cause by going through the steps above again.
You can now remove or uncomment the piece of code that is meant to test the connection from Authenticate.php, or:
// Create a test connection to the api
    // $response=$api->test()->test();
    // if($response===true){
    //    echo'API connection successful!';
    // }
Using Authenticate.php
In the steps above, you have created the file Authenticate.php. Here, the function $api is used to set up a connection with the TransIP REST API.
You can now easily call upon the API in other PHP files by adding the following line:
require_once(__DIR__ . '/Authenticate.php');In PHP, __DIR__ automatically enters the directory from which the script is executed. Suppose you create a .php file in /var/www/html/example.com, then /var/www/html/example.com is entered as a value for __DIR__ and the line is read as: require_once (/var/www/html/example.com/Authenticate.php);
If you create a subdirectory from which your PHP script calls upon Authenticate.php (for example /var/www/html/example.com/directory), you'd adjust the line as follows:
require_once(__DIR__ . '/../Authenticate.php');After using $api, you can then call upon the functions that are defined in our API, for example $api->vps()->getAll(). You can find several examples of how this works in the 'examples' folder in our PHP-library, and in this tutorial.
Finding the names of functions, and entities
For developing your application we recommend using an IDE so that you can more easily find the names and parameters of various functions.
Are you not using an IDE and are you looking for the name of a function to call a repository (e.g. vpsBackups or domainDns)? Then look in the 'src/Transip/Api/Library/TransipAPI.php'. Here you will find the names of the available repositories (e.g. domainDns). Then look in the 'src/Transip/Api/Library/Repository' folder for the name of the specific function you want to use (e.g. getByDomainName).
This concludes our tutorial on setting up automated authentication using the TransIP REST API in PHP. In the 'examples' folder in the PHP-library, or in this tutorial, you'll find examples for using the API, for example to modify DNS records.