


This article explains how to configure your email address at TransIP using Classic Outlook for Office 365.
If you're not sure which version of Outlook you're using, visit Microsoft's page 'What version of Outlook do I have?'.
Haven't created an email address yet? Get started right away with our Web Hosting and Email Only services. Read the article 'creating a new email address' for more information.
To use email with our Web Hosting and Email Only services, your domain name needs to use the correct DNS records.
If your domain name uses the TransIP settings, we will automatically take care of the DNS for you. If you want to configure the DNS yourself, make sure to add the MX, TXT and CNAME records for your Web Hosting or Email Only service.
- The article 'The DNS settings of my Web Hosting' shows you which DNS records you need to add.
- The article 'Entering DNS records and nameservers via the control panel' shows you how to add these DNS records.
Configuring your email address in Classic Outlook for Office 365
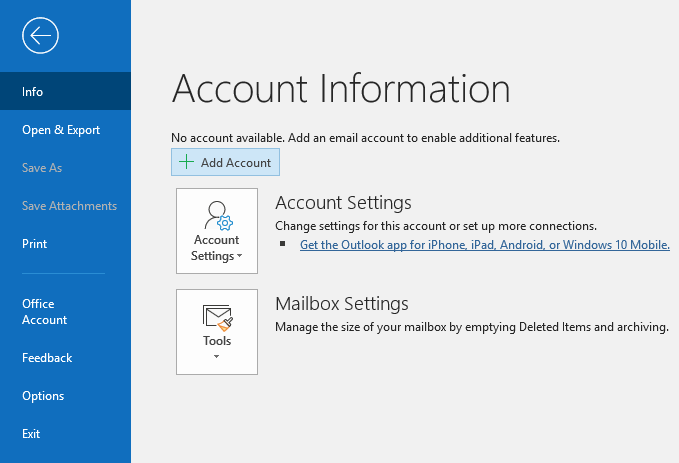
Step 1
Inside Outlook, head over to 'File' in the top left corner. Next, click 'Add account' to start the configuration of your email address in Outlook for Office 365.
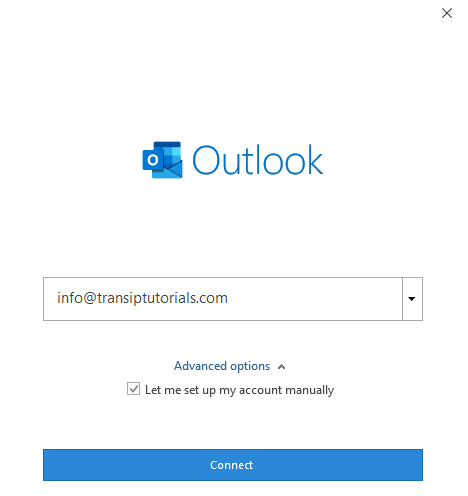
Step 2
Enter your email address and click 'Advanced options'.
Check the box next to 'Let me set up my account manually' and click 'Connect'.
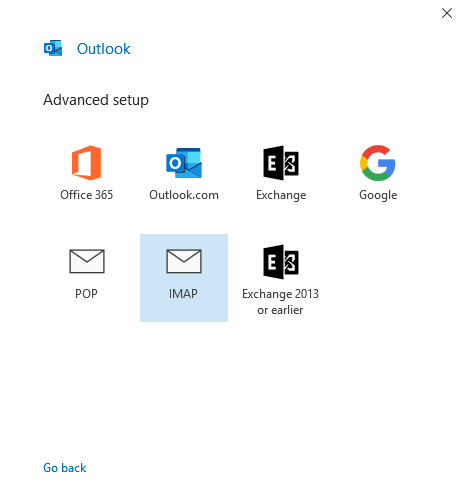
Step 3
Select 'IMAP'.
Step 4
If you're immediately asked for your password after selecting IMAP in Step 3, then your domain name uses the TransIP settings. The TransIP settings contain a DNS record that lets Outlook request the required settings automatically. If you're asked for your password, head over to Step 5.
If you need to enter additional information for your email address, then your domain name does not use the TransIP settings.

Enter the information as shown below.
Incoming Mail
- Server: imap.transip.email
- Port: 993
- Encryption method: SSL/TLS
Outgoing mail
- Server: smtp.transip.email
- Port: 465
- Encryption method: SSL/TLS
Once you've entered these settings, click 'Next'.
Step 5
Enter the password of your email address and click 'Connect'.
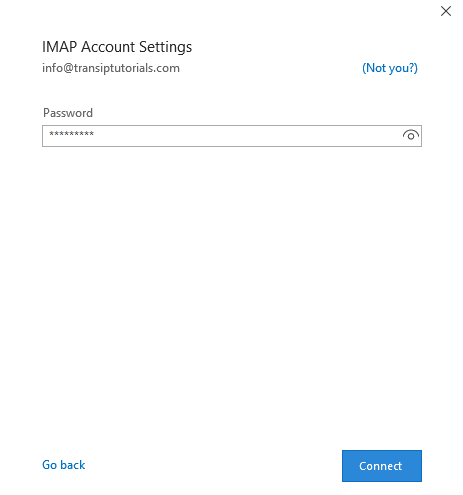
Can't remember your password? Use the steps in the article 'Changing the password of your email address' to set a new one.
Step 6
Your email address has now been succesfully configured in Outlook for Office 365.

Click 'Done' to start using your email address in Outlook right away!
Did you enter all settings correctly, but receive an error after clicking 'Connect'? You can manually configure all the advanced settings in Outlook for Office 365 to make sure everything is added correctly. Read the article 'Configuring your email address manually in Outlook for Office 365' for a step by step turorial.
In this article we've explained how to set up your email address in Classic Outlook for Office 365.