With our web hosting packages, you can use SFTP to upload the files to your website. In this article you'll learn how to upload the files of your website using the SFTP software Cyberduck.
Cyberduck is ideal for mac users. For Windows, we recommend Filezilla. If you'd rather upload the files of your website via your control panel, you can use SFTP File Manager instead.
Keep in mind that the File Manager in the control panel is best used for uploading individual folders and files. If you want to upload a large amount of folders and files, we recommend using SFTP software in stead.
Download Cyberduck
Cyberduck is free to download and easy to install. If you've already installed Cyberduck on your computer, head over to ‘Look up your SFTP data’.
If you haven't installed Cyberduck yet, you can download the software by going to the Cyberduck website. Click on a button below the giant rubber duck to download the client or download one of the apps for Windows and macOS.
Once the download is complete, open the file to start the installation wizard. Finish the installation of Cyberduck and open the software.
Look up your SFTP information
Next, you will want to connect to SFTP via the Cyberduck software. To do so, you need the corresponding login information of your web hosting package.
Step 1
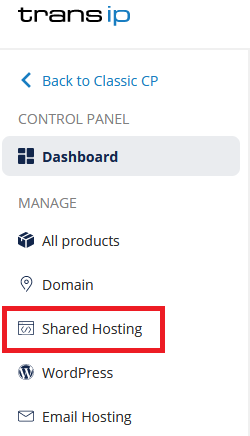
Log in to the control panel and click 'Shared Hosting' in the menu. Next, select your domain below 'Products'.
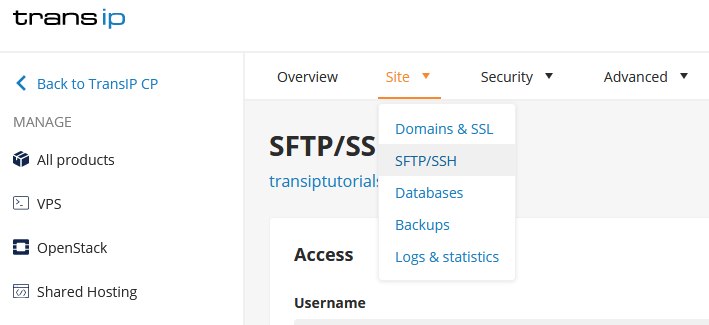
Click on 'Site', followed by 'SFTP/SSH'.
Step 2
Here you will find the login data to connect to SFTP.
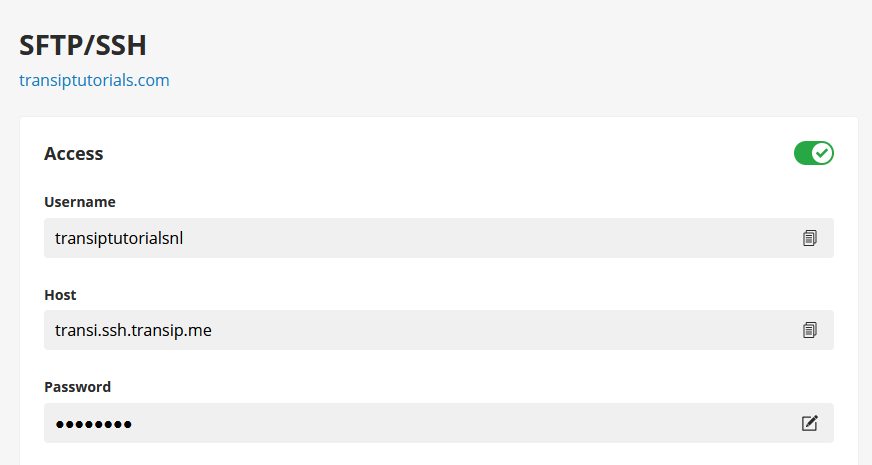
To login to Filezilla, you need the following information from this page:
- Username
- Host
- Password
- SFTP port: 22 or 2222
The password for SFTP has been sent to you by email shortly after ordering your web hosting package. If you cannot find the password or simply want to use another password, change your password on this page.
Write down this information and open Cyberduck.
Step 3
Click on 'Open connection' at the top left.

Step 4
In the following prompt you enter the login details for your website, which you wrote down earlier. Make sure that 'SFTP (SSH File Transfer Protocol)' is selected in the upper field.
Fill in the following fields:
- Server: <SSH host>
- Port: 22 or 2222
- Username: <SSH username>
- Password: <SSH password>
Adding these credentials to your Keychain is optional.
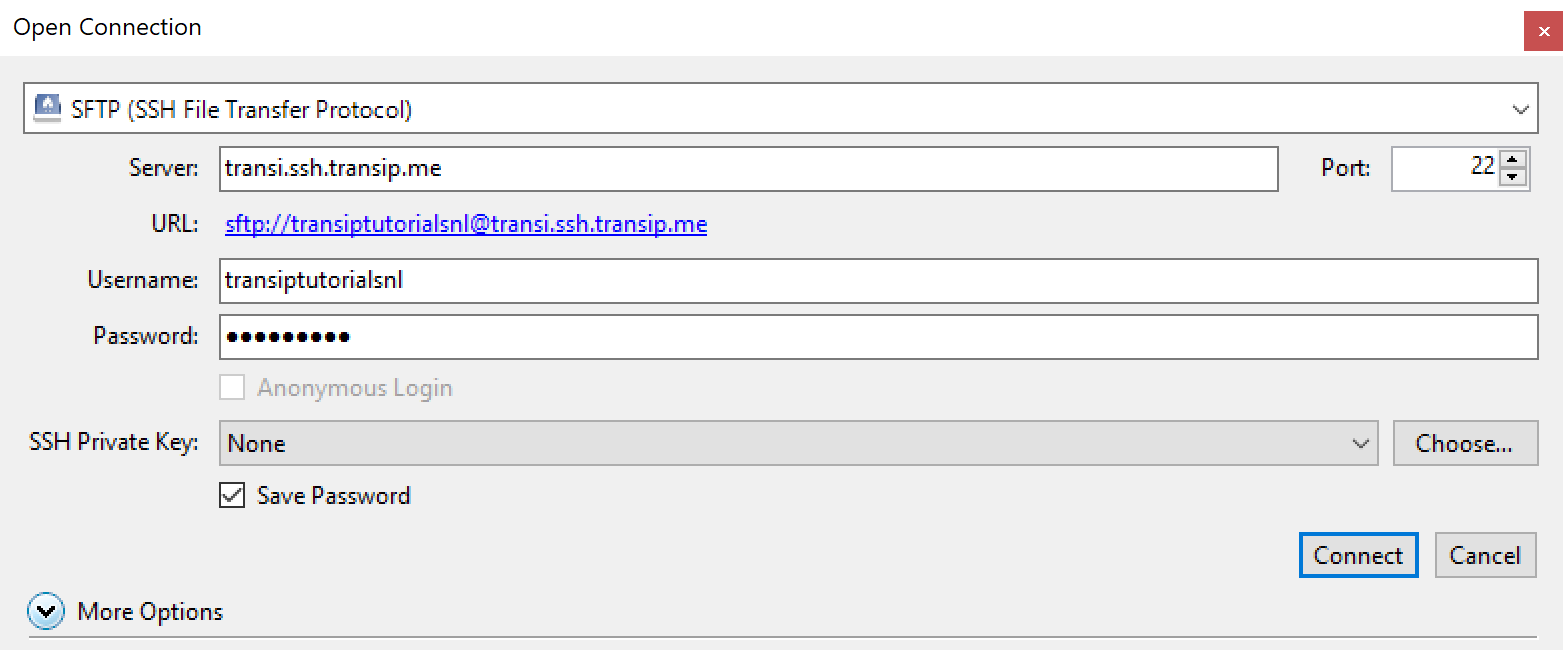
If you are unable to login, make sure to check if you've entered the correct information or try the other port number (22 or 2222).
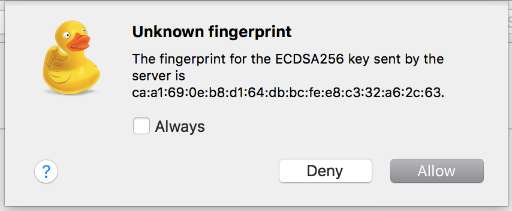
You may also see a prompt after logging in, showing 'Unknown fingerprint'. Click 'Allow' to continue.
Step 5
You will now be succesfully logged into Cyberduck and the files of your website will be visible.
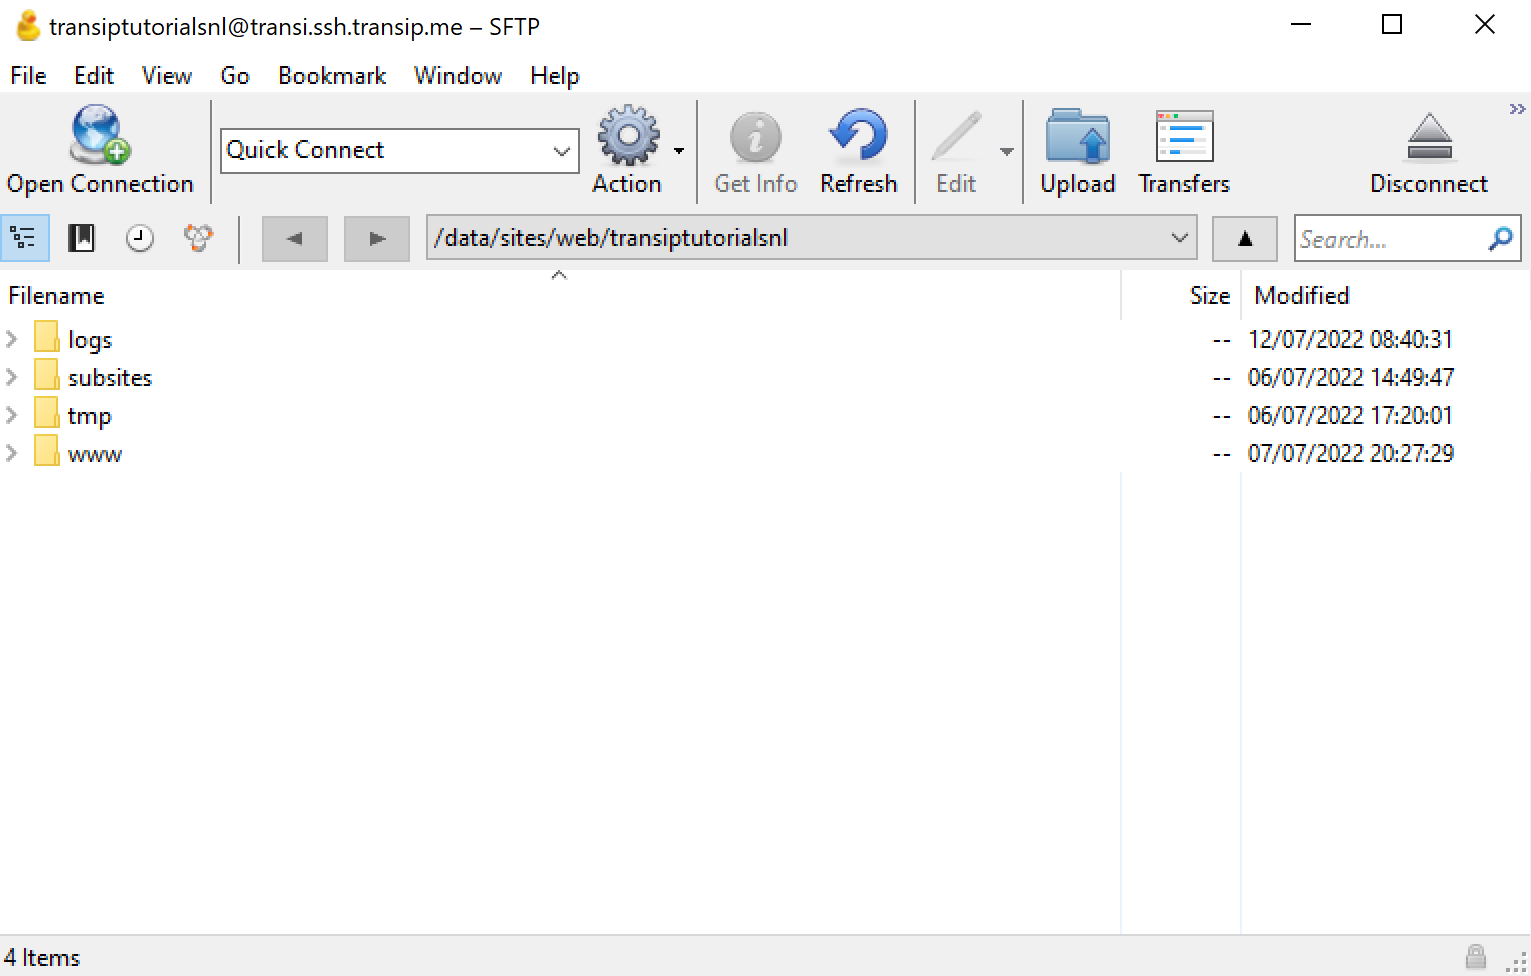
To upload files to your website, simply drag files and folders from your local folder to the folder in Cyberduck.
To create a backup of your files, right click on a folder or file and click 'Download'. Cyberduck will start a download in a prompt. The folder where the backup is downloaded to is shown at the bottom of the prompt.
In this article we explained how to use the SFTP software Cyberduck to upload files and folders to your website on a web hosting package.


