


The internet is not exactly a safe place: vulnerabilities are found in operating systems every day and attacks by bot networks take place all the time.
pfSense helps you protect yourself against this: it is a free firewall operating system that gives you enterprise level security. With a pfSense firewall you can have all the public traffic (i.e. traffic over the open internet) from your VPSs go through the pfSense firewall. Depending on your use case, the VPSs themselves can even be inaccessible to the public internet, so that they can no longer be attacked just like that. In addition, additional useful tools are built into pfSense, such as a VPN server and DNS server.
In this pfSense tutorial we will guide you through the installation process of a new pfSense firewall.
- The steps in this tutorial require at least one VPS with pfSense and a private network.
- The pfSense installation process has changed as of version 2.8.0. Below, choose the steps which fit the version of pfSense you're using.
pfSense installation
pfSense 2.8.0 and newer
Step 1
Optionally, before you start the installation, first add your pfSense firewall to the Private Network that also contains the VPSs which will use the pfSense firewall. This simplifies the configuration later in this guide and is the safer way to start with pfSense, as it prevents public access to the pfSense web interface. Do note that in that case you’ll need a VPS in your Private Network that has a GUI with a browser.
If the pfSense installation has already started, then after adding it to the Private Network, restart your VPS via the console in the control panel so the network adapter for your Private Network is definitely detected.
Step 2
TL;DR: press Enter 4 times and go to step 5.
You’ll now see the copyright and trademark terms. Review them and press ‘Enter’ to accept.

Step 3
Next you’ll see a welcome screen: this screen is intended both for installation and for troubleshooting pfSense. The installation option is selected by default. Press ‘Enter’ again to start the installation.

Step 4
A confirmation will now appear that the network installation is about to start. Press ‘Enter’ to continue.

You’ll then be asked to select the WAN network interface (i.e. the public-facing one). By default, the automatically selected interface ‘VTNET0’ is used. Press ‘Enter’ again to continue.

Step 5
In this step you can adjust the network operation mode. Before making a choice, be sure to read the part below the screenshot about the local resolver. After any changes, press ‘Enter’ to continue.

- DHCP/Static for automatic or static IP configuration. If you choose static, don’t forget to specify the IP range /24 when setting the IP address (e.g. 123.123.123.123/24).
- VLAN Tagging: whether you want to use a VLAN tag on the interface. In principle you’ll almost always choose “VLAN tagging disabled”. This option is mainly relevant when you only have a single network adapter without a Private Network.
- Use local resolver: uses Unbound on the pfSense firewall as DNS resolver instead of the upstream DNS resolvers (for example, those from TransIP). This is an important option; there are several good privacy and security-related reasons to use it. We explain these in our article ‘Waarom wel/geen eigen DNS resolver gebruiken’.
Step 6
Now select vtnet1 as the LAN interface and press ‘Enter’.

Step 7
Next, configure the LAN interface as desired. After making any changes, select ‘Continue’ and press ‘Enter’ again.
- IP Address: Adjust the local/LAN IP address as desired.
- DHCPD Enabled = false: We recommend a static configuration so it’s easier to identify your pfSense firewall in more complex environments, for example by linking a local domain name to it in an Active Directory.

Step 8
Now confirm your choices with ‘Enter’, or first select ‘Assign/Configure’ if you want to make changes to your configuration.

The connection will now be checked automatically. This usually takes no more than about 10 seconds and you don’t need to do anything else—just wait until you reach step 9.

Step 9
pfSense is available as a free Community Edition (CE) and a paid premium edition, pfSense Plus. See the overview of features that Plus offers compared to CE and the pfSense Plus FAQ. You’re free to choose whether you use the free CE edition or the paid Plus edition. For the purposes of this guide, we assume you’re using the free CE edition.

Step 10
TL;DR: press ‘Enter’ 5 times and go to step 12.
In this step you choose a file system and partition scheme. You’re free to choose, but the default options ZFS and GPT are the most modern and optimal choices. Press ‘Enter’ to continue.

You’ll then see a confirmation screen asking whether you want to adjust the ZFS Virtual Device configuration type. There’s no alternative to the indicated option, so just press ‘Enter’ to continue.

Finally, select the disk on which you want to perform the installation. Unless you’ve attached a block storage device to your VPS, there will only be one option here. Press ‘Enter’ again to continue.

Confirm your choices once more with ‘Enter’.

Step 11
You’ll now see a menu where you can choose which version of pfSense to install. For security reasons we recommend always installing the latest stable version and continuing to update your pfSense VPS regularly.

The installation will now start and should take no more than a few minutes.

Step 12
Finally, restart your pfSense VPS to complete the installation and continue with the section ‘First-time login to pfSense’.

pfSense 2.7.2 and earlier
Step 1
Before you start the installation, add your pfSense firewall to the private network, which also contains the VPSs that will use the pfSense firewall. This greatly simplifies the configuration later in this tutorial.
If the installation of pfSense has already started and your VPS is not part of a private network, restart your VPS via the console in the control panel after adding it to the private network so that the network adapter for your private network is guaranteed to be detected.
Step 2
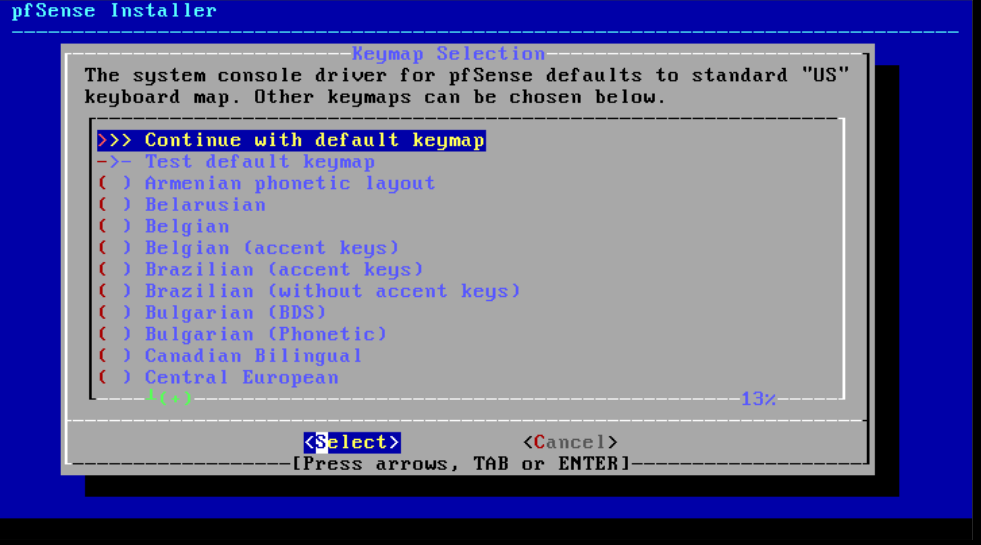
After starting the installation, you will first be given the option to choose a keyboard language. By default, it is set to US-international. Press 'Enter' to continue.
Step 3
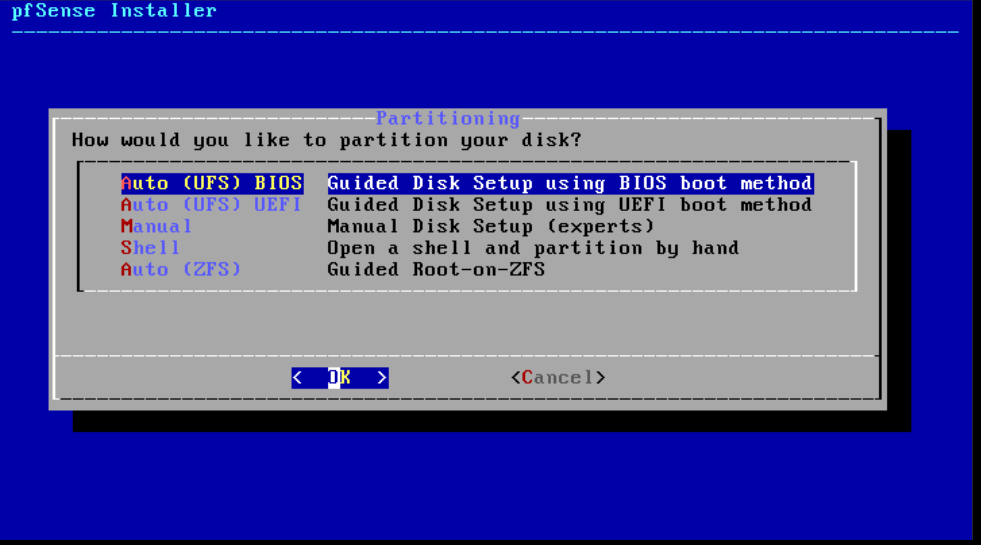
Now choose a partitioning option. We choose 'Auto (UFS) BIOS' for our installation, but you are free to choose. Please note that UEFI is not optimally supported by FreeBSD, on which pfSense is based.
Step 4
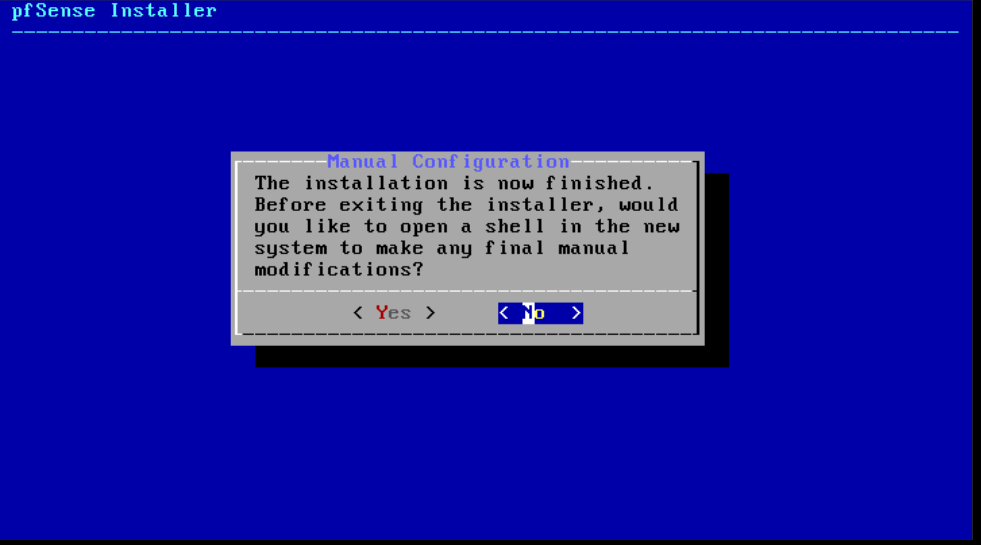
The installation is now running. Afterwards, the installer asks if you want to make any changes. Select 'No' here. Your VPS will now reboot.
Step 5
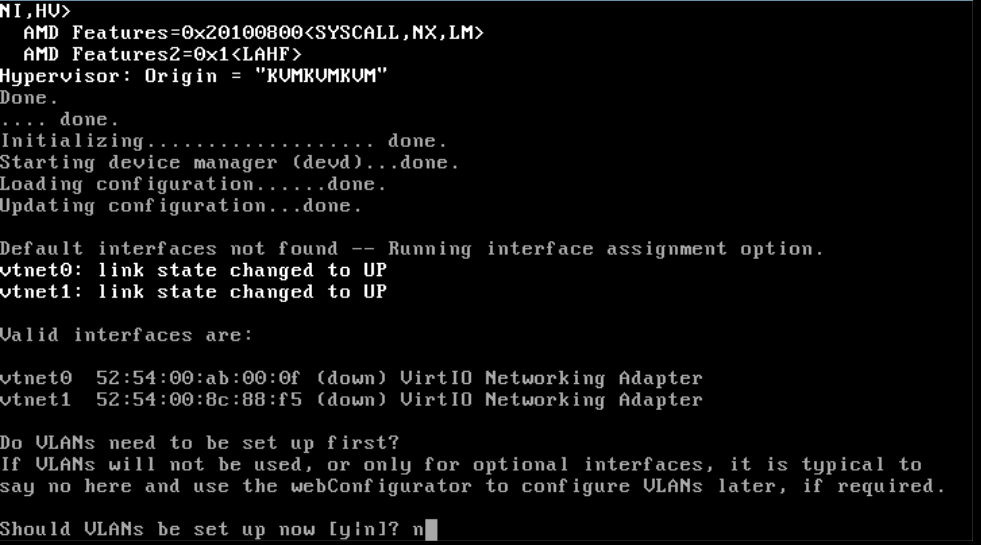
You will now be greeted by a configuration wizard in the pfSense shell. The wizard allows you to configure a VLAN but recommends that you do this later. We're following this advice, so choose 'n' here to continue.
Step 6
Then set up the WAN adapter, or the network interface for your public internet connection. You see the available network interfaces in bold. With a VPS on one private network, the rule is simply that the first interface is your WAN interface and the second is the LAN interface (of the private network).
Type the interface name 'vtnet0' and press 'Enter'.
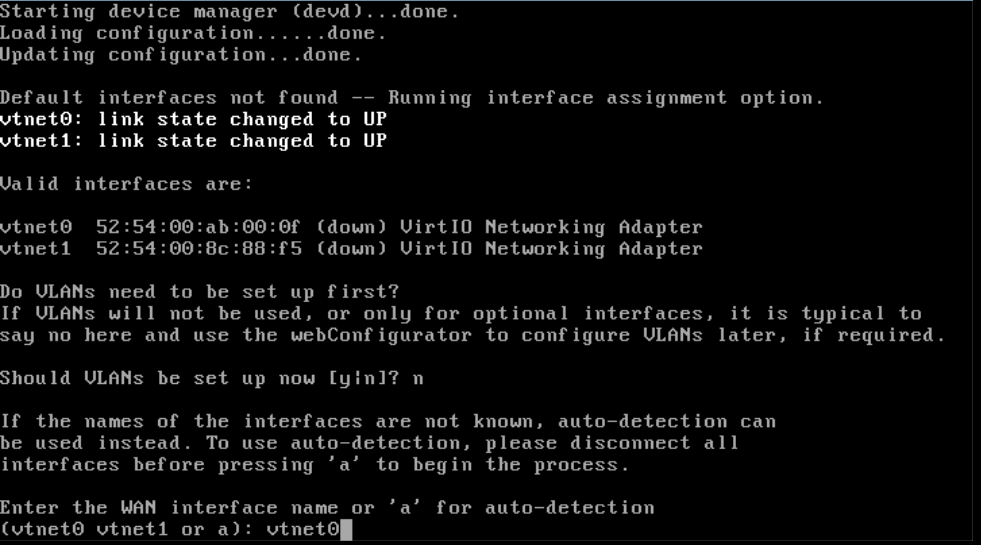
The first interface is your WAN interface and the second is the LAN interface of the private network. If the VPS is part of several private networks, the third interface (usually vtnet2) is the interface for the second private network to which the VPS is added, the fourth (usually vtnet3) is the interface for the third private network, etc.
This is an important step where your choice depends on your current setup:
-
Do you use a private network that includes a pfSense firewall and at least one VPS with a browser? Then enter the name of your LAN interface, namely 'vtnet1' and continue with step 8.
-
Are you using a private network with a pfSense firewall without a VPS with a browser? Then leave this option blank and press 'Enter' to continue. Then proceed to step 14.
- Has your VPS not yet been added to a Private Network? Then do so after the installation, leave the option in this step blank and press 'Enter' to continue. Then proceed to step 14.
The reason this is important is that if you specify a LAN interface here, the pfSense web interface will only be accessible via your private network and not via your public IP address. You can easily adjust this, as we explain in our manual 'pfSense: webGUI access via public internet'.

Step 8
You are now in the shell menu of pfSense. pfSense automatically gives your LAN interface an IP address. There is a good chance that this automatic IP address is located in a different subnet than the other VPSs in your private network. Therefore choose option '2' to statically set an IP address.

Step 9
Choose the interface you want to change the IP address of, in this case '2' for your LAN interface.

Step 10
Enter a new IP address for your LAN interface that falls in the same subnet as other VPSs in your private network, for example 192.168.0.1

In our example we choose 192.168.0.5: there were already a number of VPSs in our test environment using the first addresses and 192.168.0.5 falls within the same subnet as the LAN IP addresses of the other VPSs on our test private network (with IP addresses 192.168.0.1, 192.168.0.2 etc).
Step 11
Speaking of subnet: pfSense now asks you for the 'subnet mask'. When in doubt, you can consult this cheat sheet. In our test setup we choose 27 (maximum 32 hosts). pfSense chooses 24 for an automatic configuration.

Simply put, the subnet mask determines how many IP addresses fall within a network. With a subnet mask of /27, or 192.168.0.0/27, (see the cheat sheet) you can use 32 hosts. Suppose you give 32 VPSs the IPs 192.168.0.1 to 192.168.0.32, then they are all within the same /27 subnet. A VPS that comes after that with 192.168.0.33 would not fit in there.
Step 12
Press 'Enter' twice to not specify a gateway and IPv6 address and choose 'n' to not use DHCP for your LAN interface: the whole point of the previous steps was specifically to set your network configuration statically.

Step 13
Finally, you will be asked if you want to use HTTP instead of HTTPS for the web interface of pfSense. Choose 'n' here and press 'Enter'.

You are now returned to the pfSense shell menu and can proceed with the next chapter ‘Logging into pfSense for the first time’.
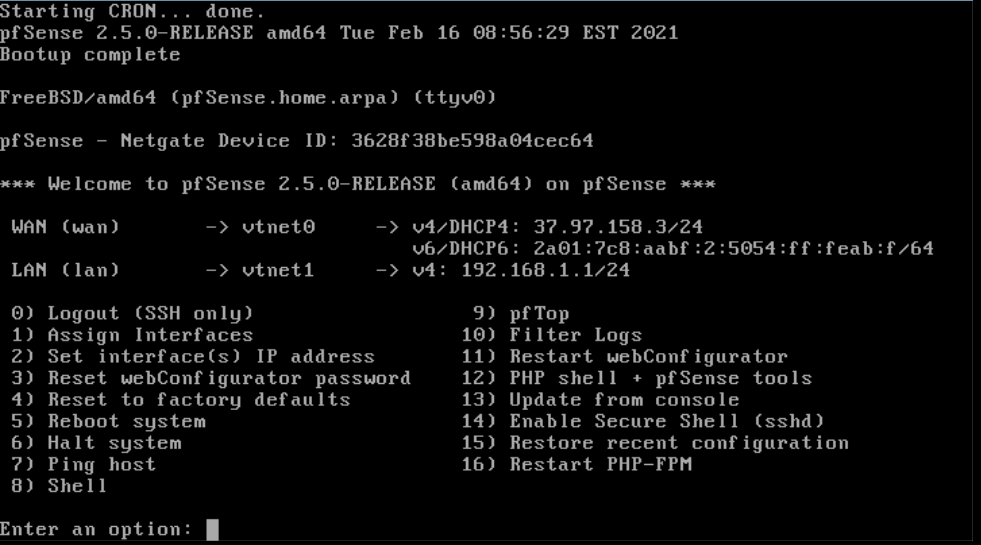
Logging into pfSense for the first time
Step 1
You can now log in to the pfSense web interface. To do this, depending on your choice in step 7, you either go in your internet browser to the public IP address of your pfSense VPS (visible behind vtnet0 in the shell menu), or open a browser on a VPS in the same private network as your pfSense-VPS and go to the LAN IP address (visible behind vtnet1 in the shell menu).
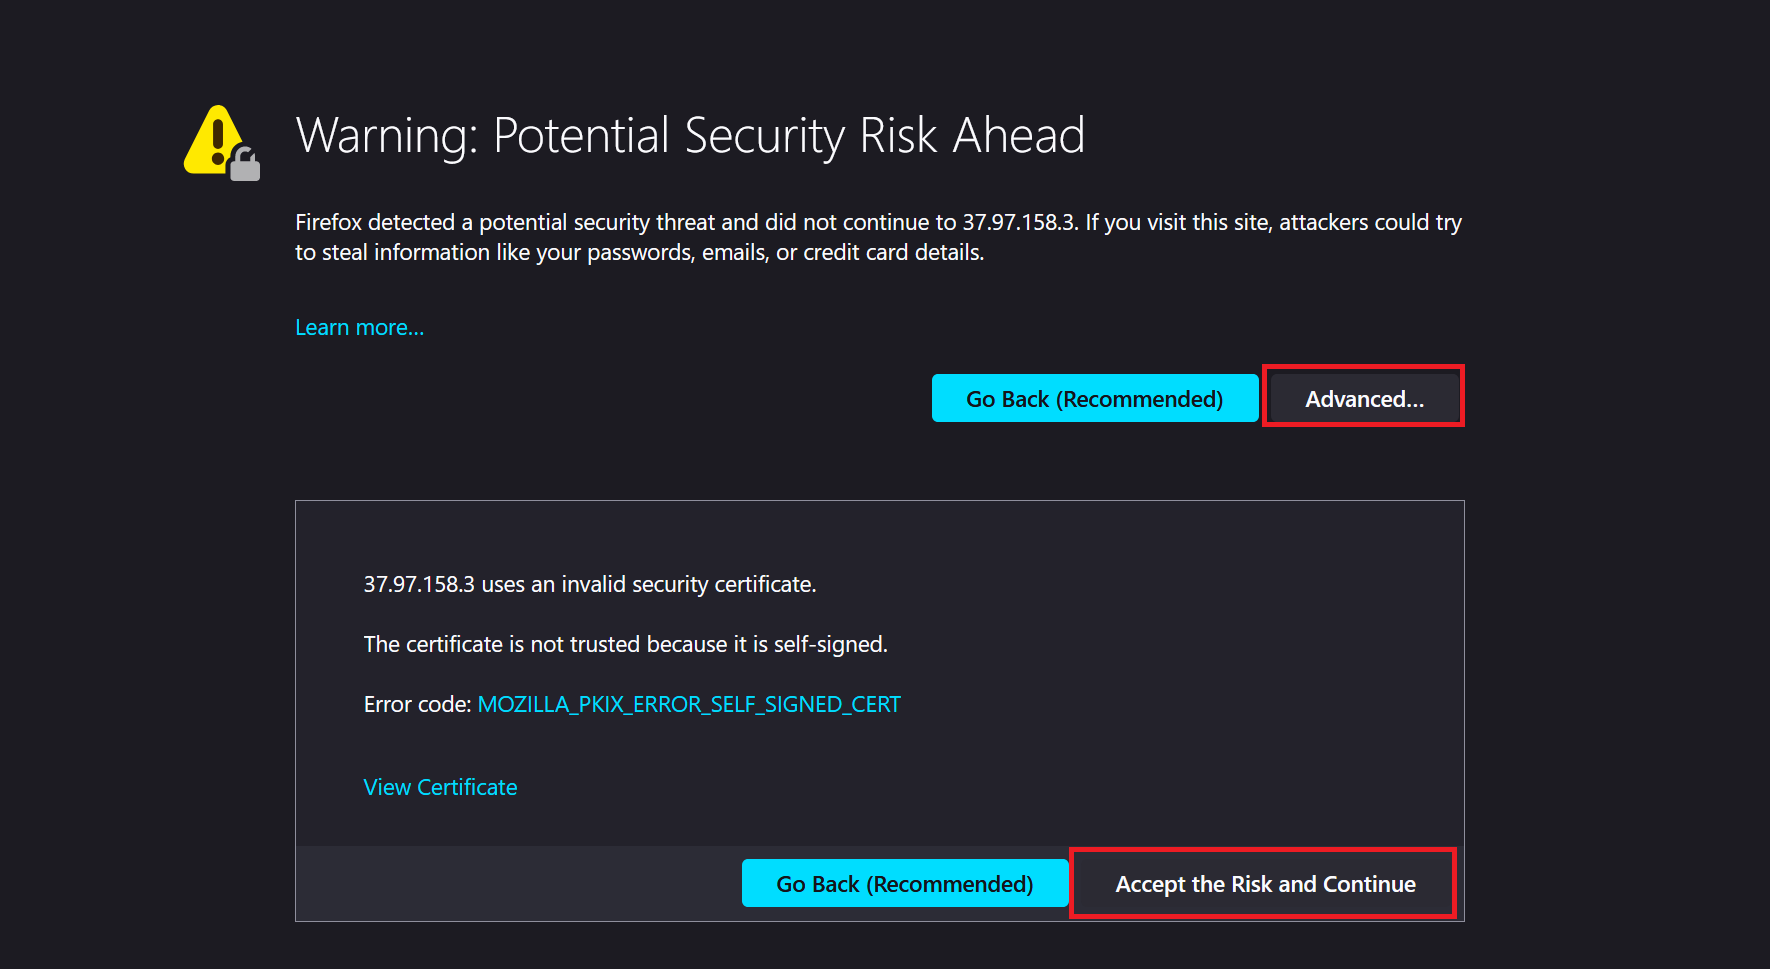
You are first greeted by a warning (this may look slightly different per browser). You will see this warning because there is (of course) no SSL certificate linked to the IP address of your VPS, nor to any (sub)domain name (see the additional tip at the bottom of this step).
Click 'Advanced' > 'Accept the Risk and Continue' / 'Accept the risk and move on'.
Additional tip: You can link the DNS of a (sub)domain to the public IP address of your firewall, for example pfsense.example.nl and then use the subdomain instead of the IP address in your browser. For a private network with its own DNS server, for example on a Windows network, you can set a local subdomain such as 'pfsense.transip.local' (see this tutorial for setting a DNS record on a Windows DNS server) . Please note that you must first go through the steps below via the LAN IP address for this to work.
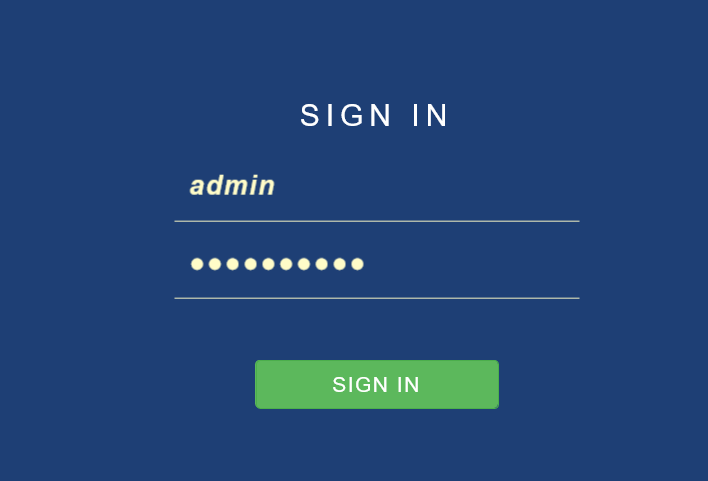
Step 15
Login using the following credentials (you can change the password later):
- username: admin
- password: pfsense
Step 16
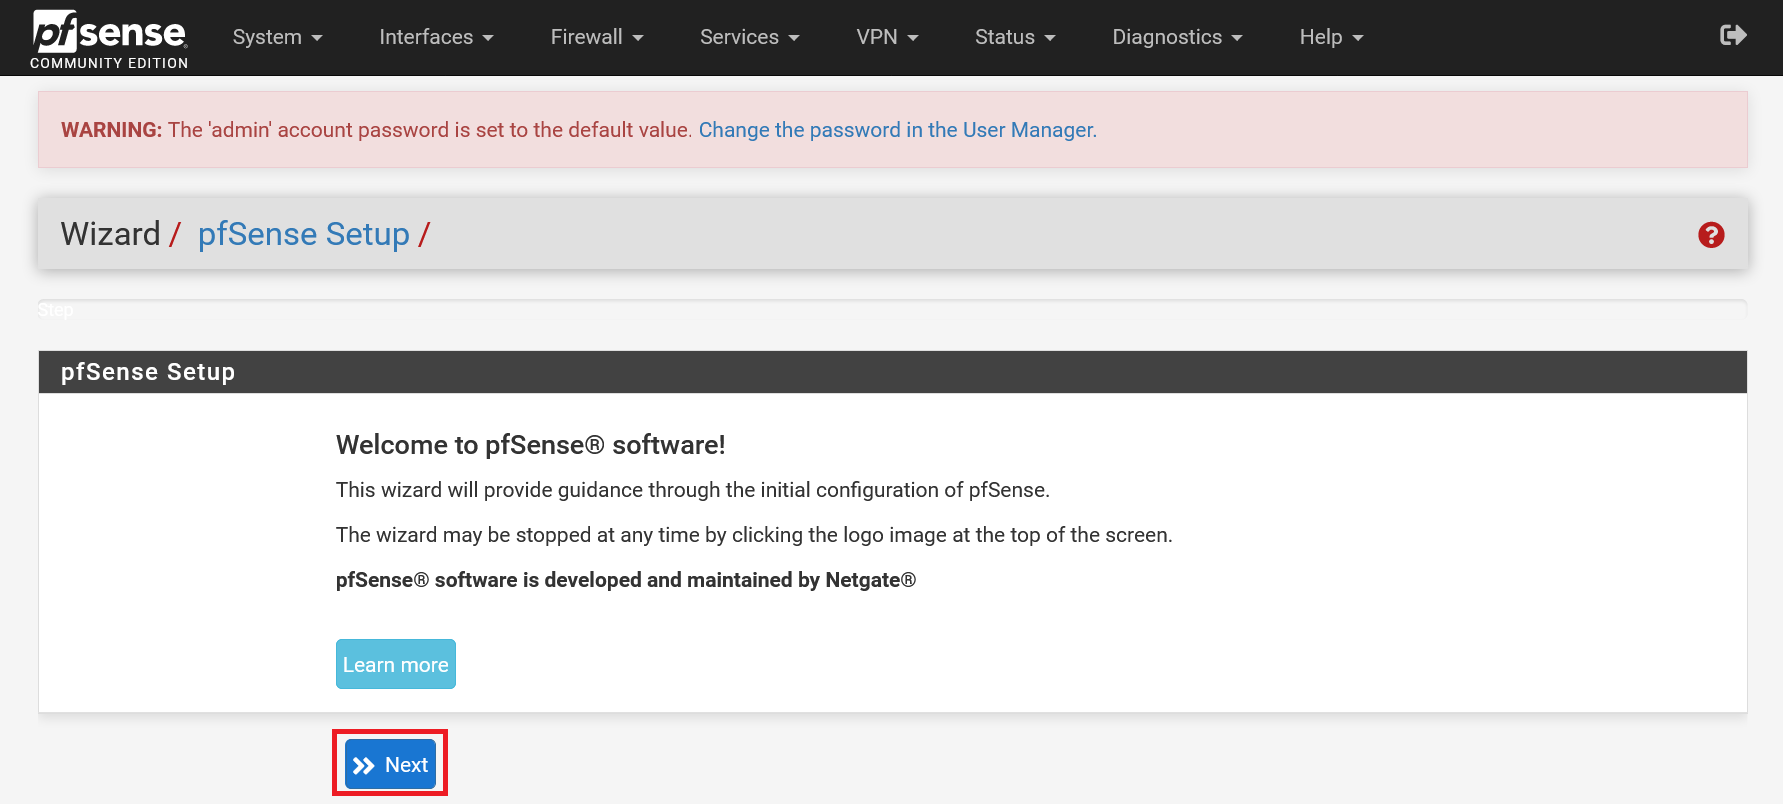
You will now be greeted by (yet another) configuration wizard. Ignore the password warning and click 'Next' to get started.
Step 17
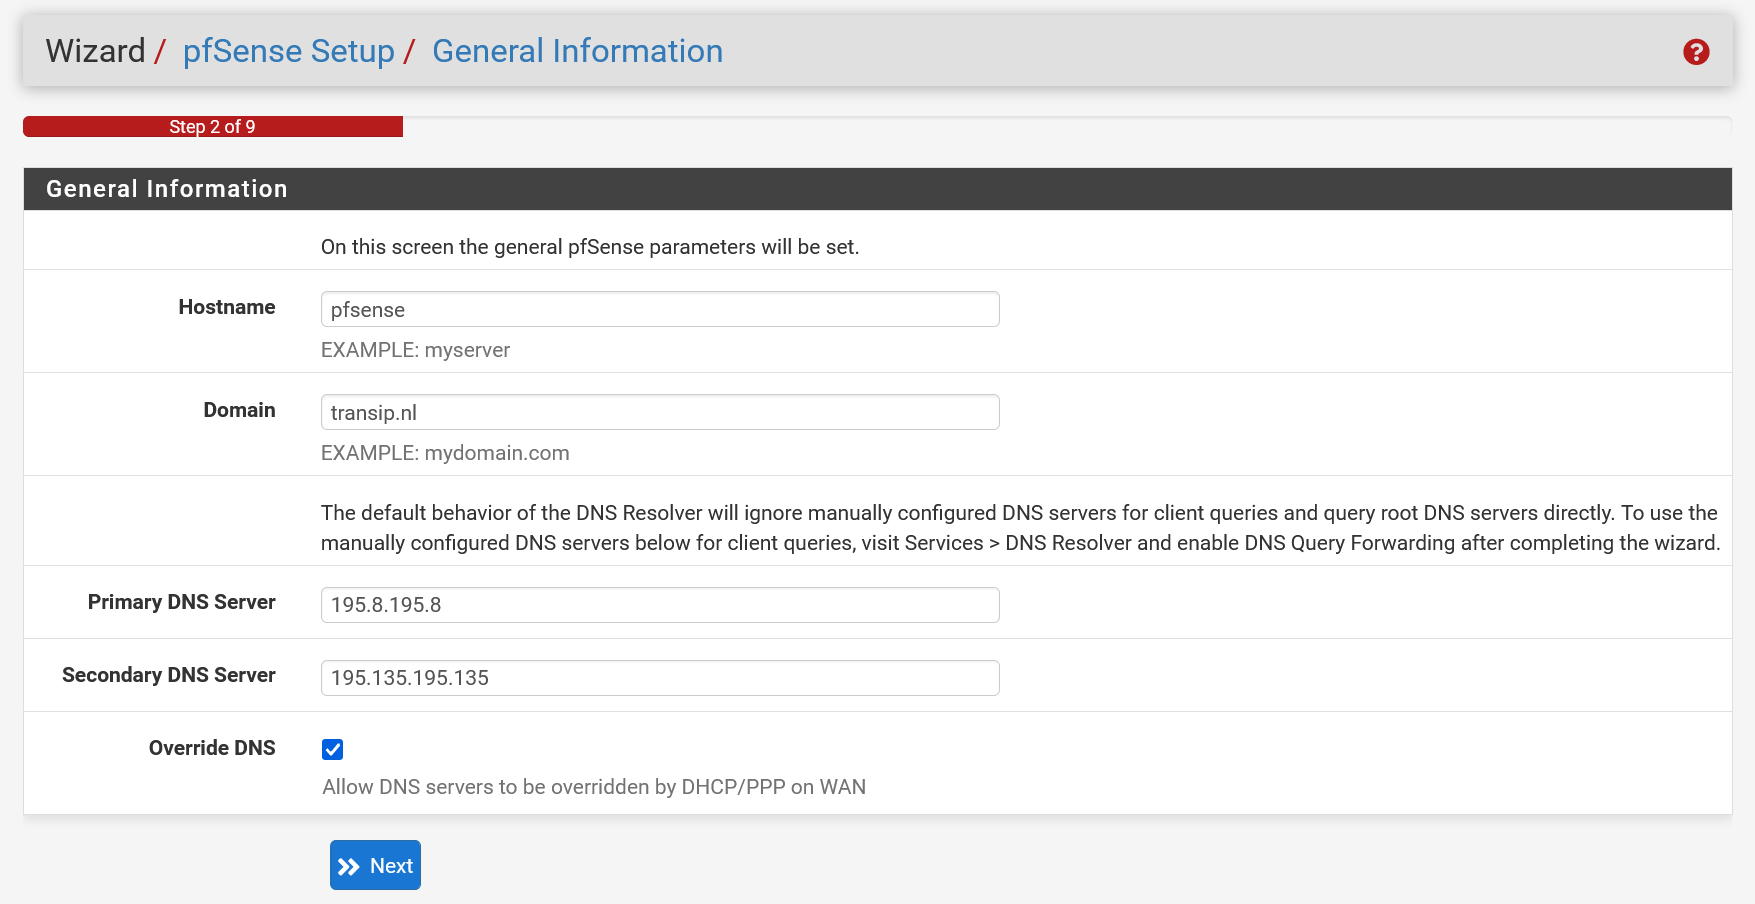
Enter the hostname, the associated domain of your pfSense firewall and the Primary and Secondary DNS Servers on this page.
- It is useful to use a publicly accessible domain for this, such as pfsense.example.nl.
- The Primary and Secondary DNS Server can be found in the TransIP control panel under 'Manage' > 'Network information'. At the time of writing, these are 195.8.195.8 and 195.135.195.135
Step 18
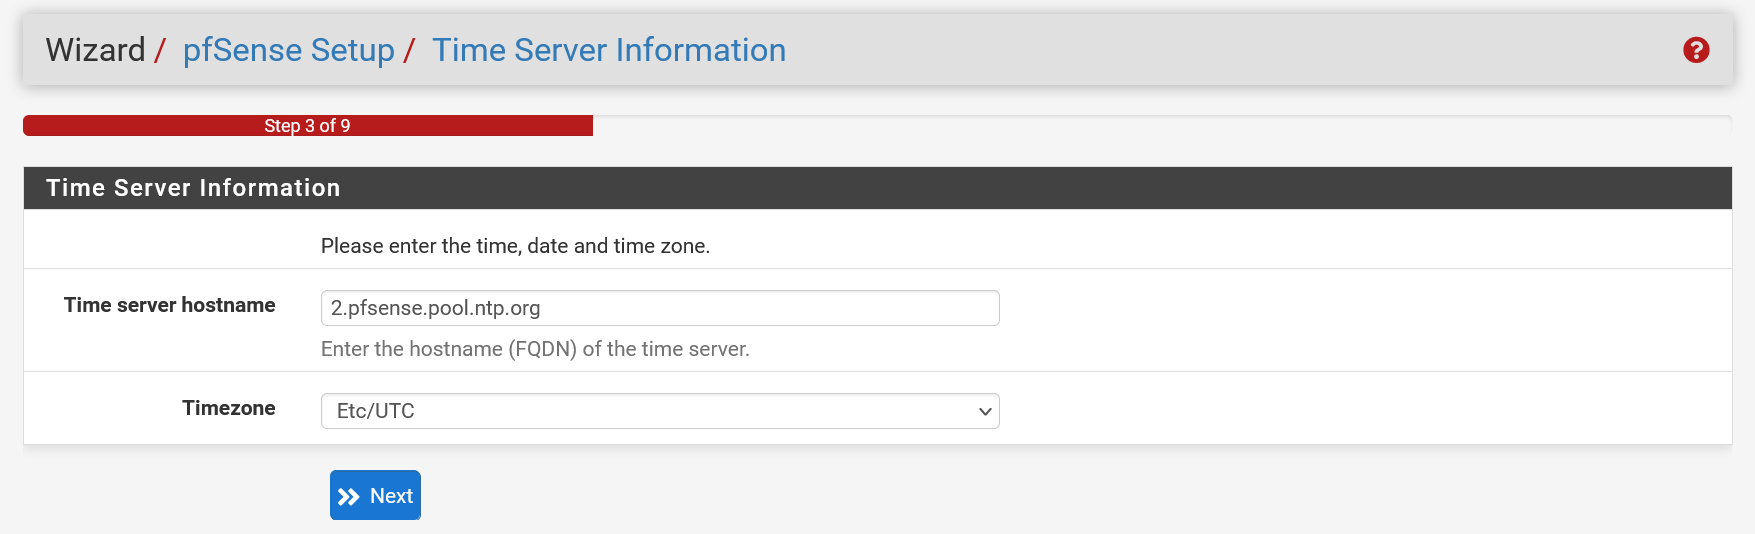
pfSense uses a number of servers out-of-the-box to synchronize the clock of your servers. These are associated with the address '2.pfsense.pool.ntp.org'. Optionally, you can specify more servers by separating them with spaces, for example: 0.pfsense.pool.ntp.org 1.pfsense.pool.ntp.org 2.pfsense.pool.ntp.org.
Step 19
You can skip the 'Configure WAN Interface' page directly. Scroll all the way to the bottom and click 'Next'.
You can adjust the MAC Address but it is only relevant if you want to spoof that, the MTU and MSS are filled in automatically, we set the primary adapter via DHCP and all other settings are ISP dependent, and you can ignore it on the TransIP network .

Step 20
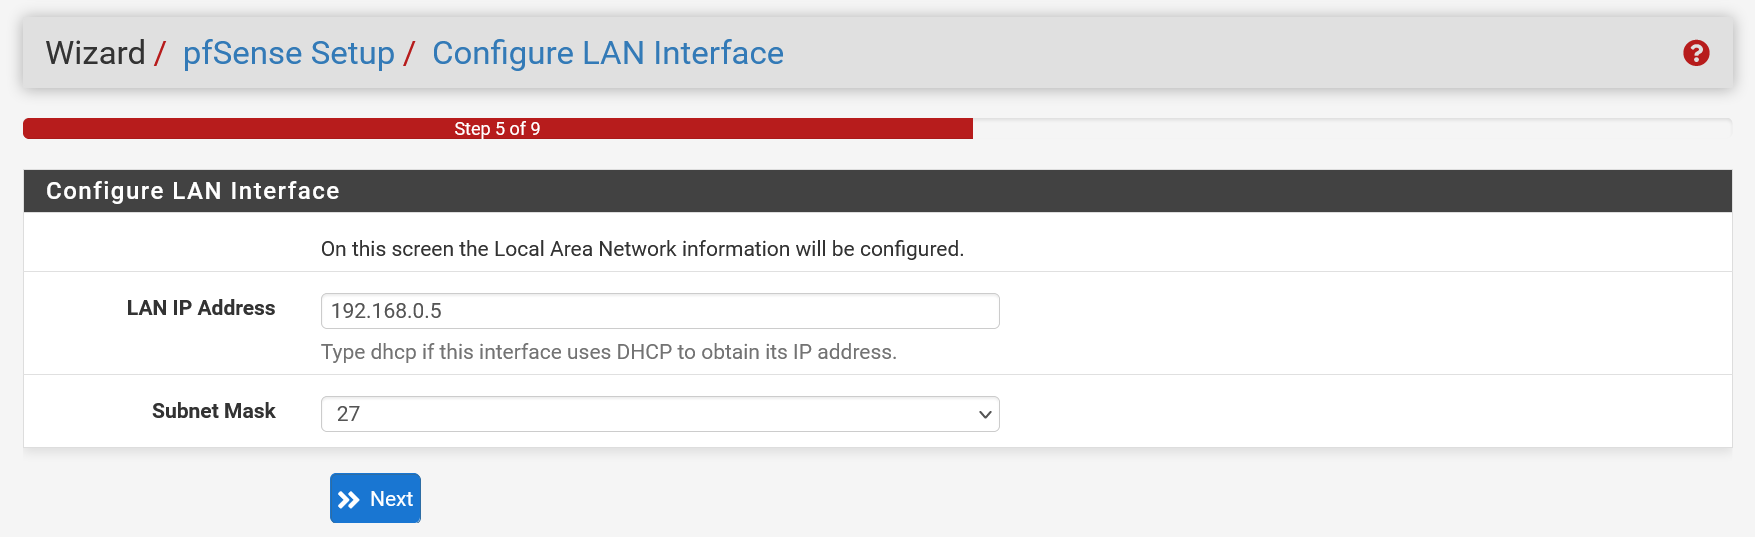
You will usually only see the LAN configuration if you have chosen to configure a LAN Interface during the configuration in the shell (step 7). You will then receive a confirmation of your chosen settings on this page. Click 'Next' to continue immediately.
Step 21
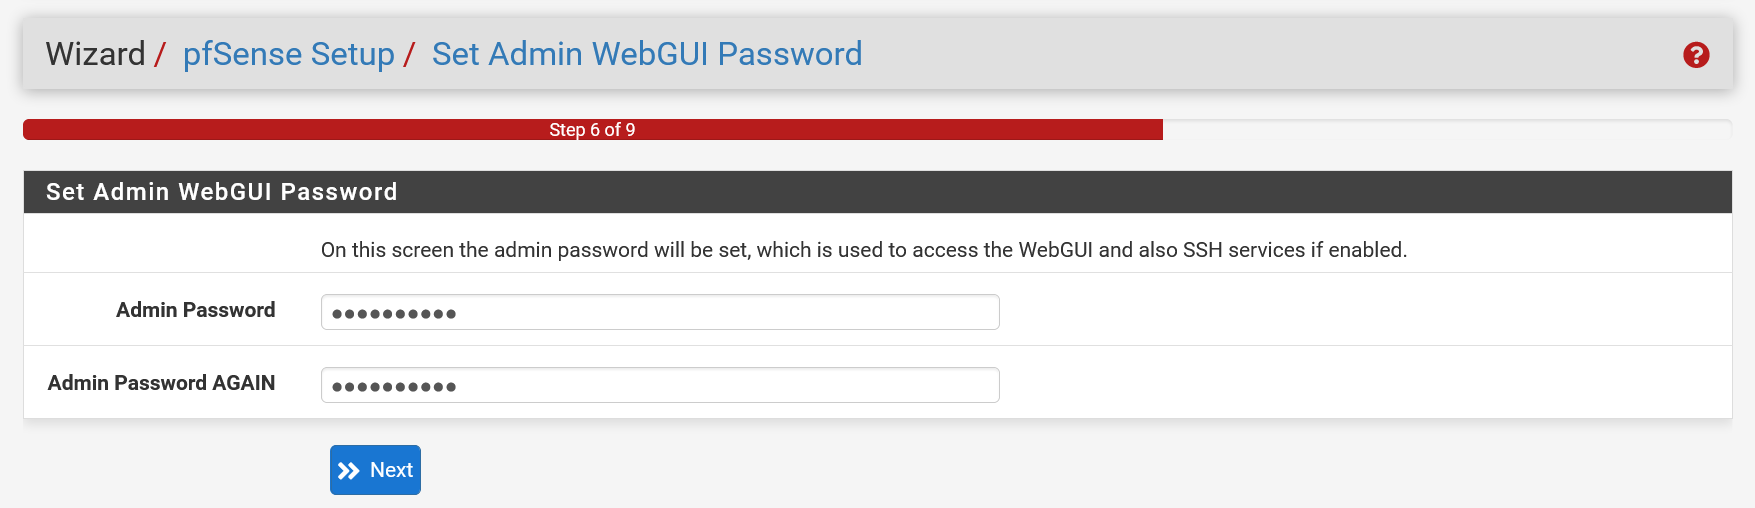
It is not very safe to use the password 'pfsense' for the 'admin' account. In this step you change it to a more secure password.
Step 22
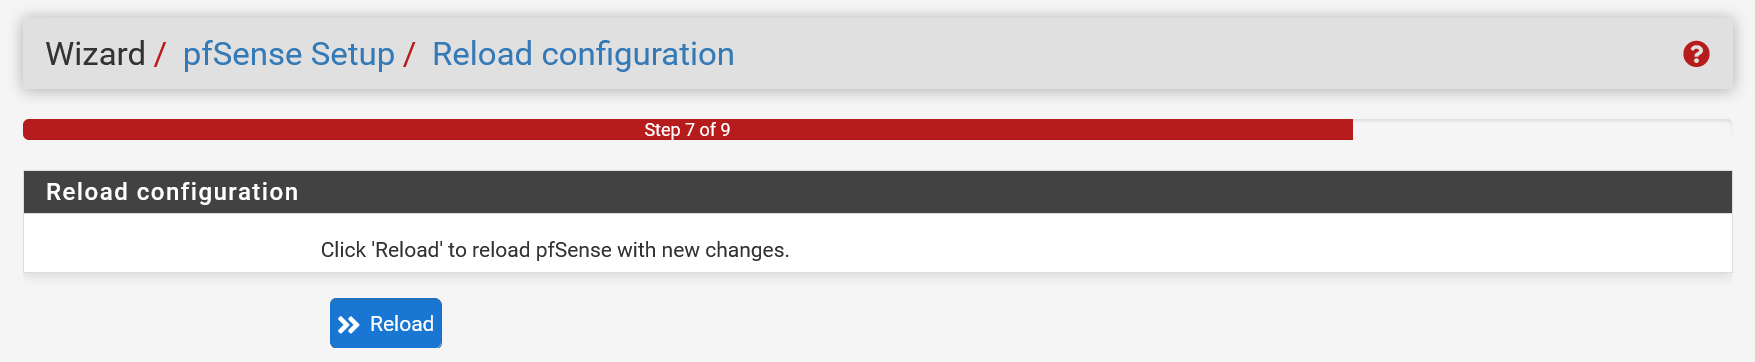
Click 'Reload' to process the changes so far and continue.
Step 23
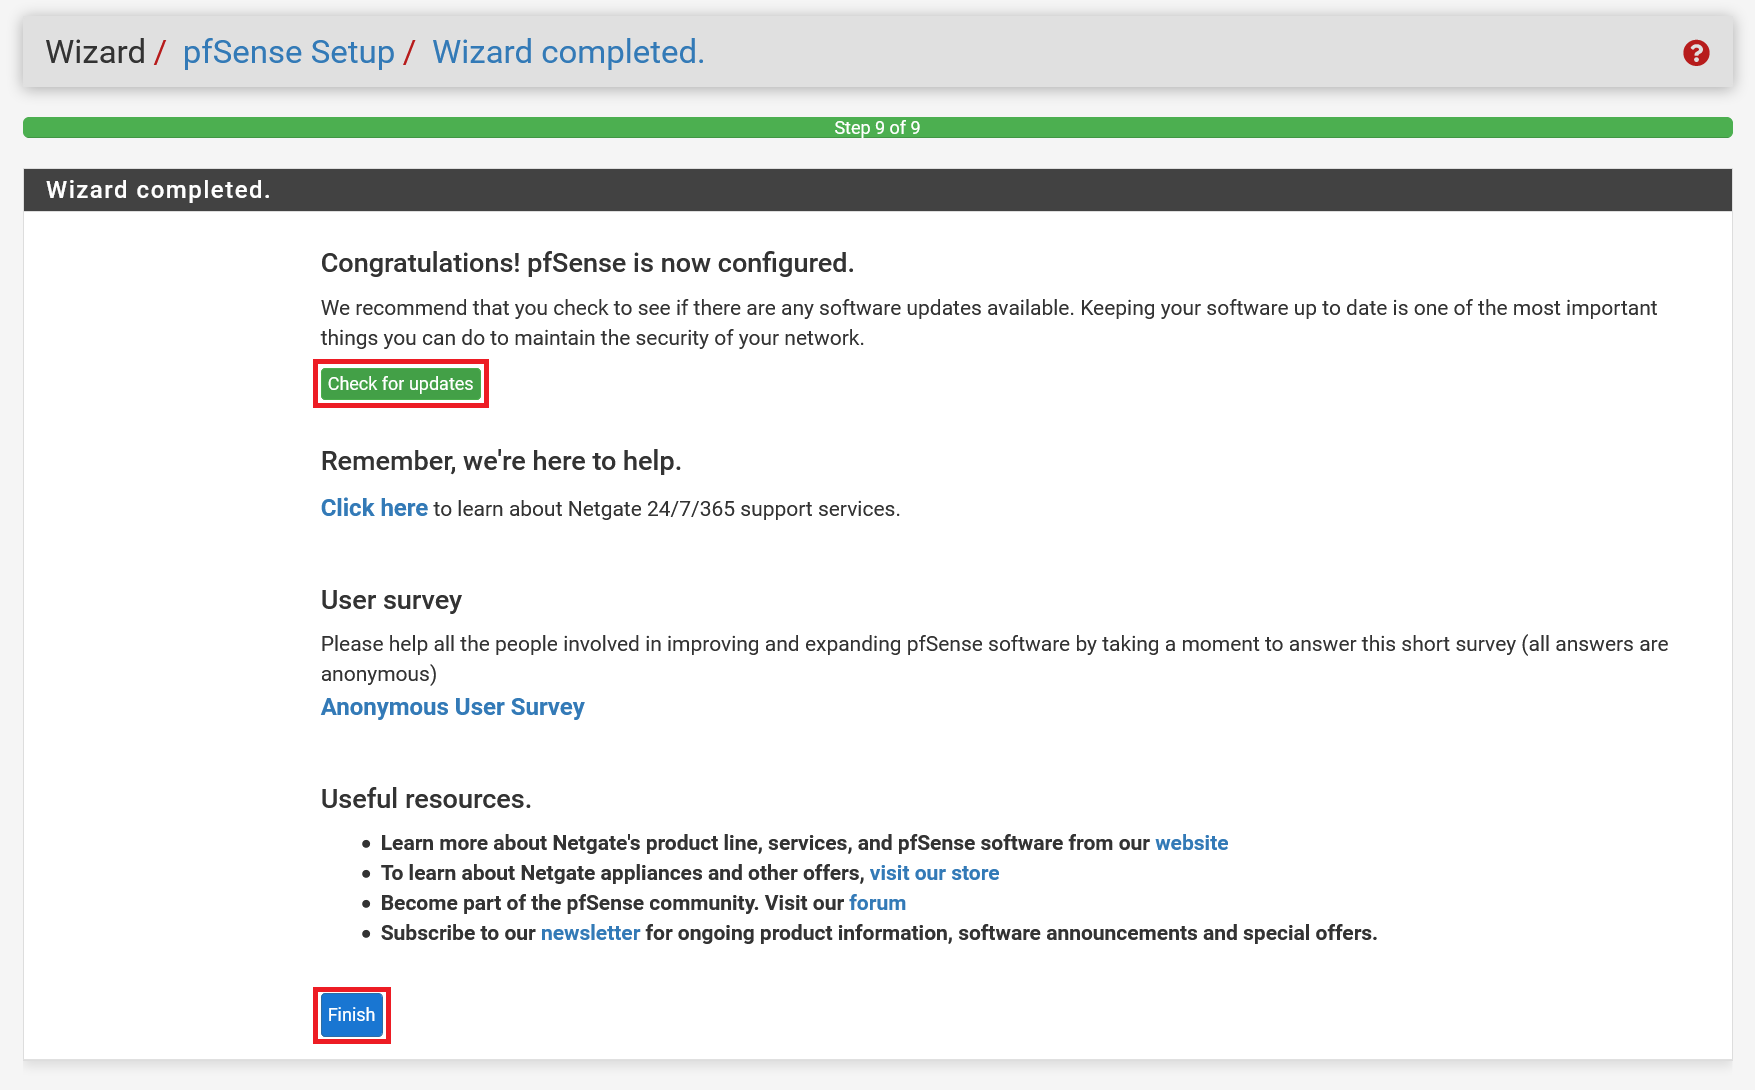
Step 8 will fly by automatically and you will automatically reach the finish line: Click 'Check for updates' to check if there are new updates available for pfSense and then click 'Finish' to complete the wizard.
Step 24
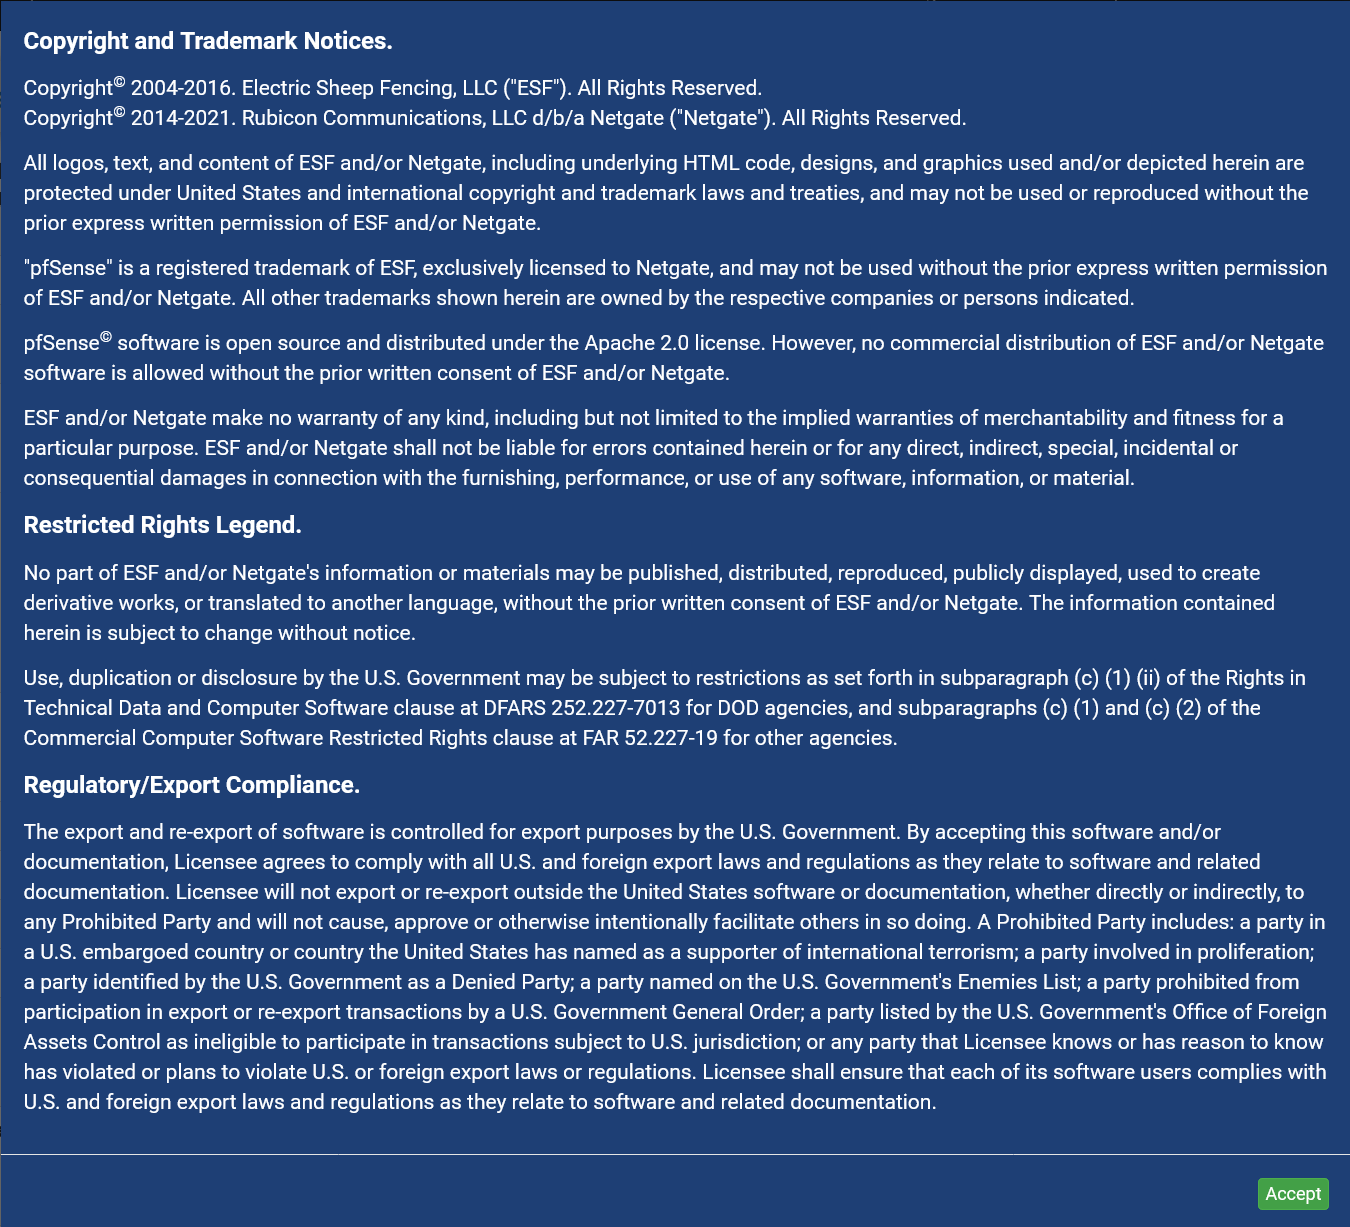
Finally, you will see a copyright & trademark. Go through it and then close it.
You are now in the pfSense dashboard and that brings us to the end of this installation manual. But... what's next?
First, we recommend that on all servers in the same private network as your pfSense firewall, point the LAN default gateway to the LAN IP address of your pfSense firewall. For Windows Servers, this is done in the blank after 'Default Gateway' in step 7 of this tutorial. This is important, for example, when a remote computer connects through your pfSense firewall and then tries to connect to a server on your private network: Simply put, your server knows to send traffic back through your pfSense firewall.
Finally, we recommend that you also consult the following tutorials:
- Forwarding public traffic via pfSense with port forwarding
- Setting up an OpenVPN server
- pfSense best practical tips
- Creating pfSense firewall rules
Please note: did you opt for an installation without a private network or a second VPS with access to a browser in step 7 of this tutorial? Then first go through our tutorial about configuring LAN interfaces in pfSense.
Also take a look at the pfSense documentation for advanced options.